For this exercise, choose two cities that you enjoyed visiting. Or choose two that you want to visit.
Choose famous cites so that it’s easy to find images of them.
Note: some screenshots show three city names. They were produced for an earlier version of the exercise which required three cities.
Get Some Images & Batch Process Them
Then go to unsplash.com and find 10 images from each place. Make sure that all of them are landscape orientation.
Download each at original size.
The images that come from unsplash are typically over 5000px or 6000px wide. Resize them all to a 2560px width. To do that all at once, there are many options. Here’s a few:
- Photoshop > File > Scripts > Image Processor
- XnConvert: free software for image conversions. [ Instructions ]
- BulkResizePhotos.com. This is quick: you can resize a bunch of images faster than the time it takes Photoshop to open.
Set Up A New WordPress Site
Set up a new WordPress site in a folder called called essayist inside htdocs.
For the name of the site (which you put in while going through the WordPress setup process), use The Essayist.
Once you’ve logged into your new site, go to Appearance > Themes and change the theme to twentynineteen.
If the twentynineteen theme is not visible, click Add New at the top of the screen and install it, then activate it.
Site Identity, Logo, Favicon
Now, go to or Appearance > Customize > Site Identity and change the description field from Just another WordPress Site to engaged editorial.
In this same place, you have the ability to upload a site logo and a site icon. The first of these will appear beside the site name in the browser. The second is a favicon (the icon that appears in tabs and bookmarks).
In Illustrator or another vector editing program, make a round logo of 512px wide and 512px tall, with a black background, then export it as a GIF or PNG8, and upload it to the site. For security reasons, WordPress does not allow SVG import.
Make sure that the design of your logo works at both sizes WordPress outputs the file at. You can see what I mean by this in the screenshot in the next section below: look at the header area and the browser tab.
If you’re happy with the way things look, click Publish to save your changes to the database.
If you get an error while cropping images, here is a fix.
CSS Changes: Header Area
In this section, please use the CSS area of the Customizer to change how your logo, site name, and site description align.
Specifically, for phones and small or medium sized tablets, make the content align in the center with the text below the image like in the image below:
(Don’t worry that my screenshot shows a post title which you have not made yet. I made the site in a different sequence than you will.)

At larger sizes, make the text beside the logo vertically align with the logo graphic, laid out as in the screenshot below.
There are a number of ways to do this alignment in CSS. However way you do it, make the text align with the middle of the site icon, not the top:
Your very best friend in figuring out how to make these changes is the browser inspector. In fact, without using the inspector, this task is very difficult.
It’s also easier if you inspect the page in a browser window in which the Customizer is not active: it adds lots of HTML and CSS to the page, so that can make figuring out what’s going on more difficult.
A Two-Minute video explaining that concept.
Home Page Set Up
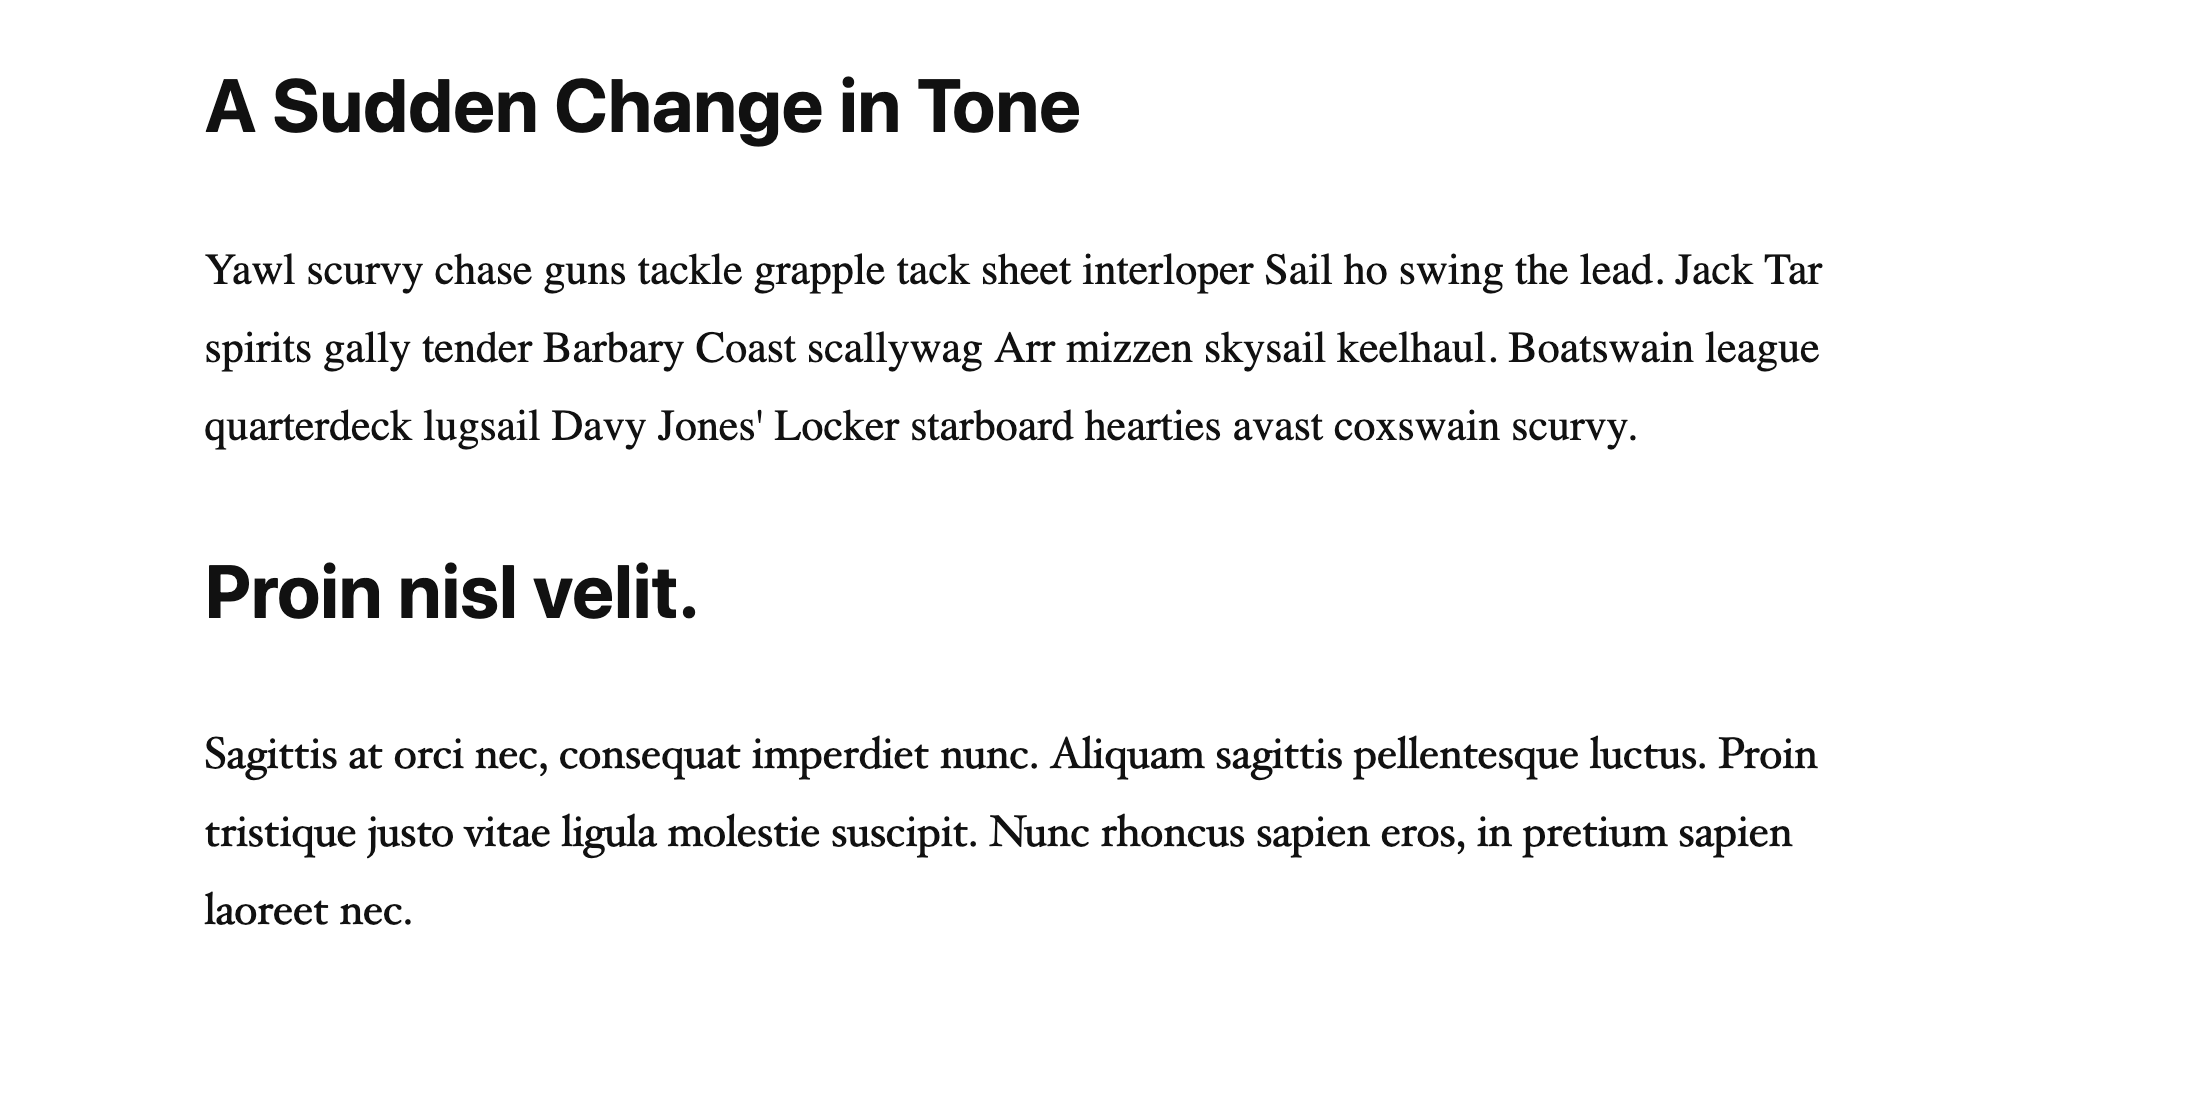
Make a new page called About EE. Copy the following snippet of lorem ipsum:
Pellentesque mattis sit amet magna sit amet euismod. Etiam aliquet, dolor vitae gravida imperdiet, ligula diam commodo neque, sed porta risus urna eget ante. Sed lobortis sit amet diam ac molestie. Ut iaculis efficitur arcu a gravida. Nunc in aliquam urna. Donec id justo varius, ornare est id, maximus odio. Duis quis pharetra ipsum, eget aliquam dolor. Sed pellentesque luctus quam, at interdum lectus cursus sit amet. Proin nisl velit. Sagittis at orci nec, consequat imperdiet nunc. Aliquam sagittis pellentesque luctus. Proin tristique justo vitae ligula molestie suscipit. Nunc rhoncus sapien eros, in pretium sapien laoreet nec. Yawl scurvy chase guns tackle grapple tack sheet interloper Sail ho swing the lead. Jack Tar spirits gally tender Barbary Coast scallywag Arr mizzen skysail keelhaul. Boatswain league quarterdeck lugsail Davy Jones’ Locker starboard hearties avast coxswain scurvy.
- Paste it into the new page.
- Turn the first four sentences into a single paragraph.
- Turn the fifth sentence (Nunc in aliquam urna) into an H2.
- Turn the the next three sentences into another paragraph.
- Turn the next sentence (Proin nisl velit) into an H3.
- Split the remaining text into two new paragraphs. The first one will begin with Sagittis at, while the second one will begin with Yawl scurvy.
- Insert another h3 between those two last paragraphs. Make the text of this new heading a sudden change in tone.
Your text should look like this:

Now figure out the easiest way to move the last paragraph and h3 above the previous h3. Hint: it’s not with cut and paste. Try to move them at the same time.
Here’s what the changed content will look like:
Set this as the Home Page
By default in WordPress, your latest posts will automatically show up on the home page of the site.
In the Customizer (or in the Settings section of the Dashboard), figure out how to designate this about ee page as the home page of the site.
Once you do that, the front page of the site will be static: this means that the front page content won’t update as you write more posts.
This is fine: lots of sites have static front pages. However, this means now that the posts we create do not automatically show up anywhere.
To fix that, make a new blank page called articles. Don’t add any content to it.
In the Customizer, set that page as the location your posts will be placed.
Make Some Posts
Make three posts for each city. Give each a unique title that mentions something worth seeing in that city. Here’s a few examples:
- New York: Central Park
- New York: Metropolitan Museum of Art
- New York: Museum of Modern Art
- Berlin: Ramones Museum
- Berlin: Topography of Terror
- Berlin: Alexanderplatz
- Paris: Luxembourg Gardens
- Paris: The Louvre
- Dublin: Phoenix Park
- Dublin: General Post Office
In each post, add six paragraphs of lorem ipsum text. This is the fake latin text that graphic designers have used for years as placeholder text when building layouts.
You can generate lorem ipsum at lipsum.com, or using Emmet shortcuts in Visual Studio Code.
Each post can have the same six paragraphs of lorem ipsum.
Add Some Headings
In every post, put an h2 after the first paragraph. Use three words of lorem ipsum: just copy them from the text that’s already in the document.
Put an H3 after the fifth paragraph: use two words of text.
Add Feature Images
Add a feature image to each post: use an image from that city. The area to add feature images is in the right sidebar (when POST is selected at the top of the sidebar).
One way to speed things up: first import all your images into the Media Library.
Don’t worry if the feature images are not about the actual area of the city your post is about: the same city is fine.
Categorizing Your Content
Make three categories for your content. Make the first travel and the other two the names of the cities you chose.
Put all the posts into the travel category. Put each of the city posts into its respective city category.
Find a way to delete the Uncategorized category and set travel as the default category.
HINT: look in the Settings area of the dashboard.
Add Some More Gutenberg Blocks
The purpose of this section is to get you to practice using some of the different block types that are available to you in WordPress.
PullQuotes
In one post from each city, add a pullquote between two paragraphs. Make the pullquote a quotation from someone. Cite that person beneath the text.
Make sure that each looks like the pullquote in the screenshot below:

Add a tag of quotations to each of the posts with pullquotes. You can add tags near where you add categories to a post: in the right sidebar area.
USEFUL HINT: You can also add tags using WordPress’s bulk edit functionality, which is found in the Posts > All Posts area.
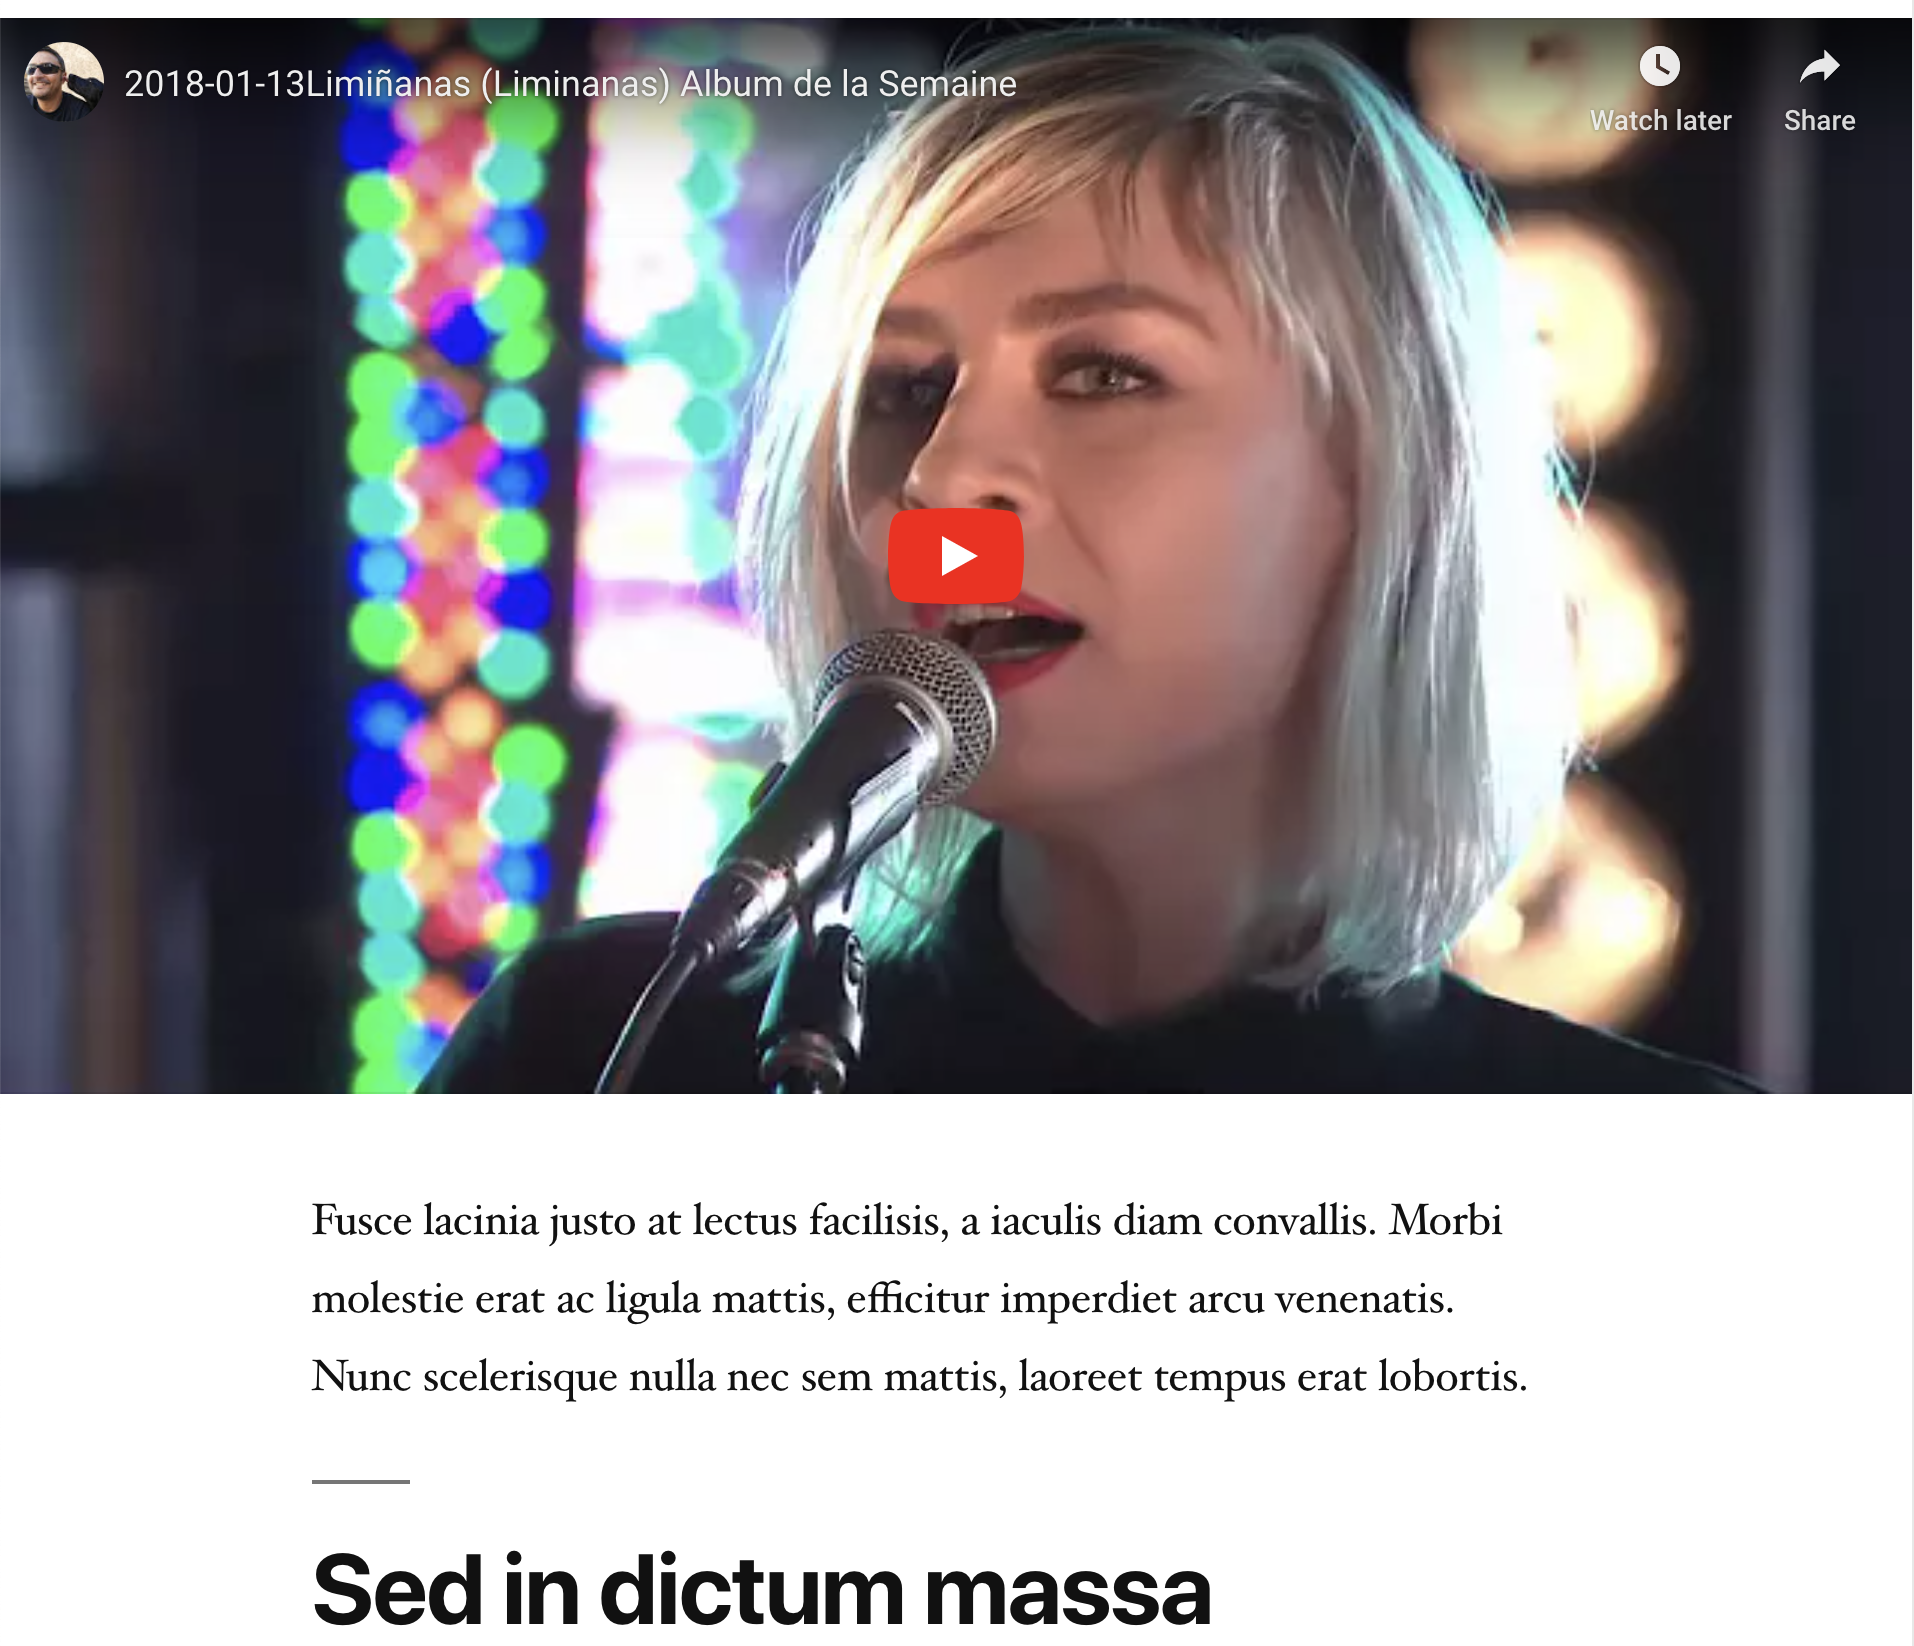
Videos: YouTube
In the same posts that you put the pullquotes in, put two YouTube videos of content related (in any way) to that city:
Make one video the size of the main column of content:
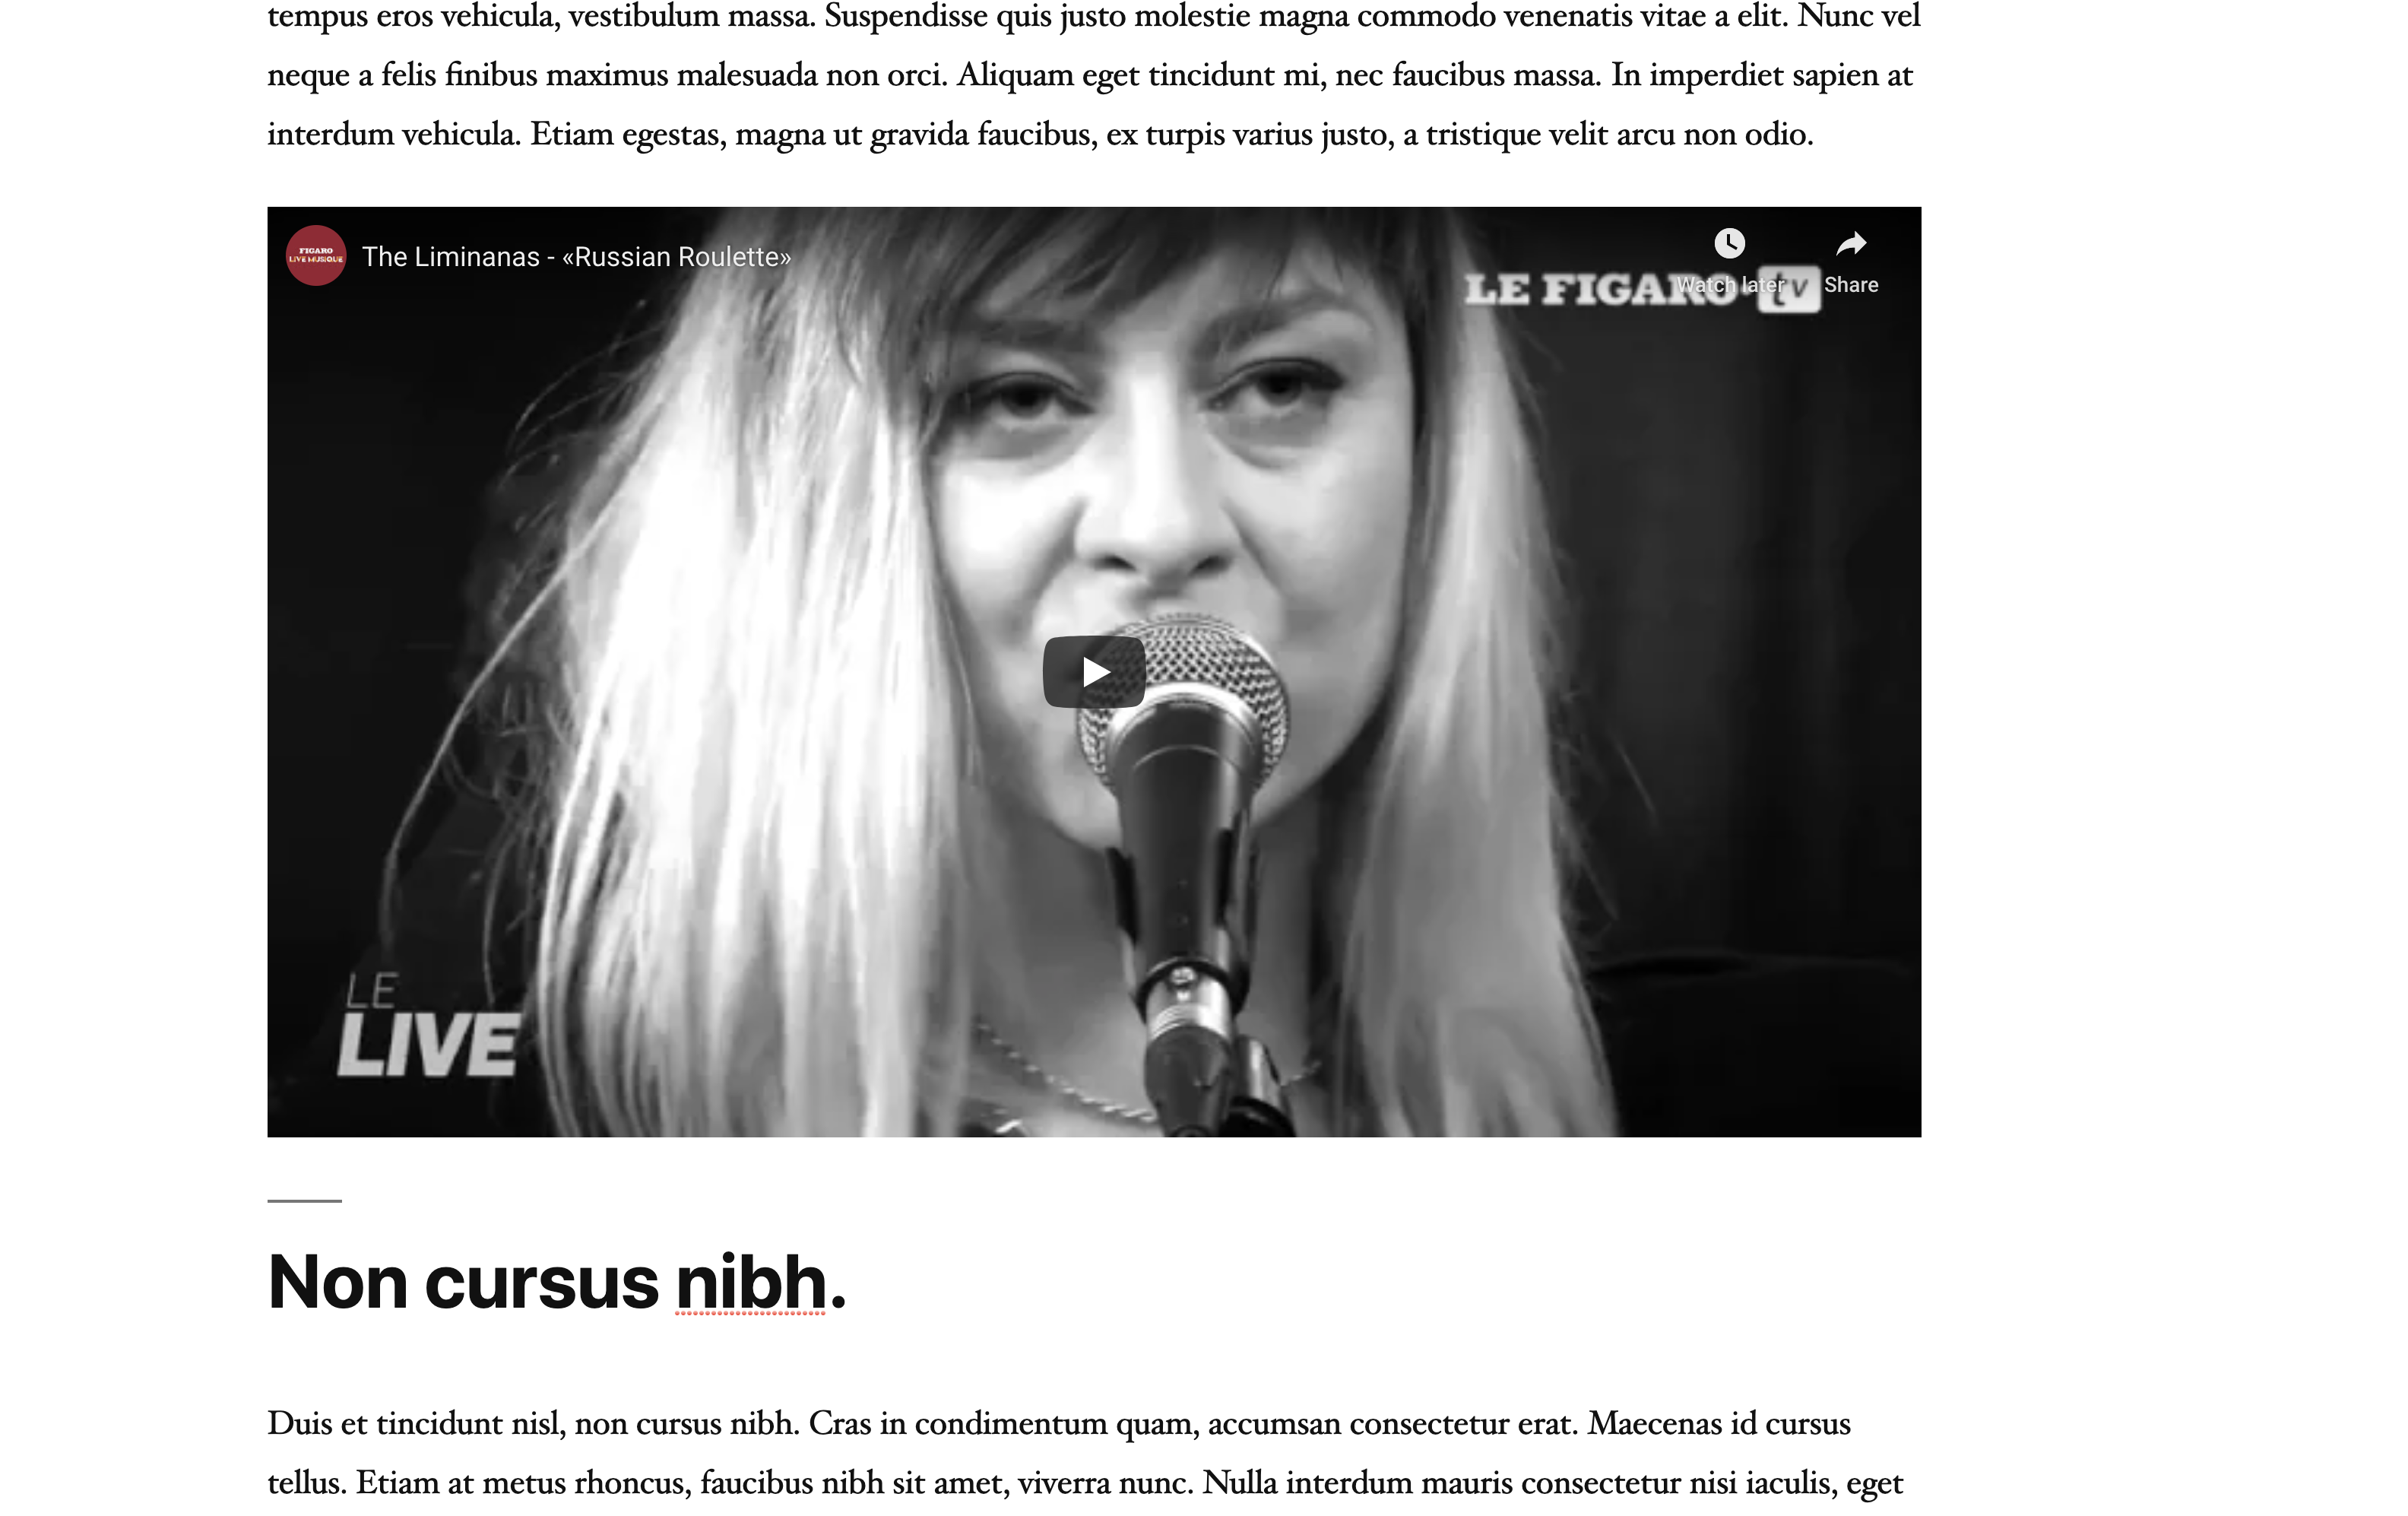
Make the other video take the full width of the page:
Add a tag of videos to the posts you’ve put videos on.
Images Set to Full Size Alignment
In one post for each city category, put two images from that city, with a paragraph or two between them. Do this to posts that you did not put the pullquotes in.
Set each of these images to take the full width of the page. Make sure that you use the Full Size of images, so that the theme does not scale them up on large monitors.
Give these posts a tag of wide high-res images.
Media and Text Blocks
In a post for each city, add a media & text. For the first post, imagine that you’re reporting a local story, like in this screenshot. Specifically, add a heading and a paragraph to the text part of the media & text block.
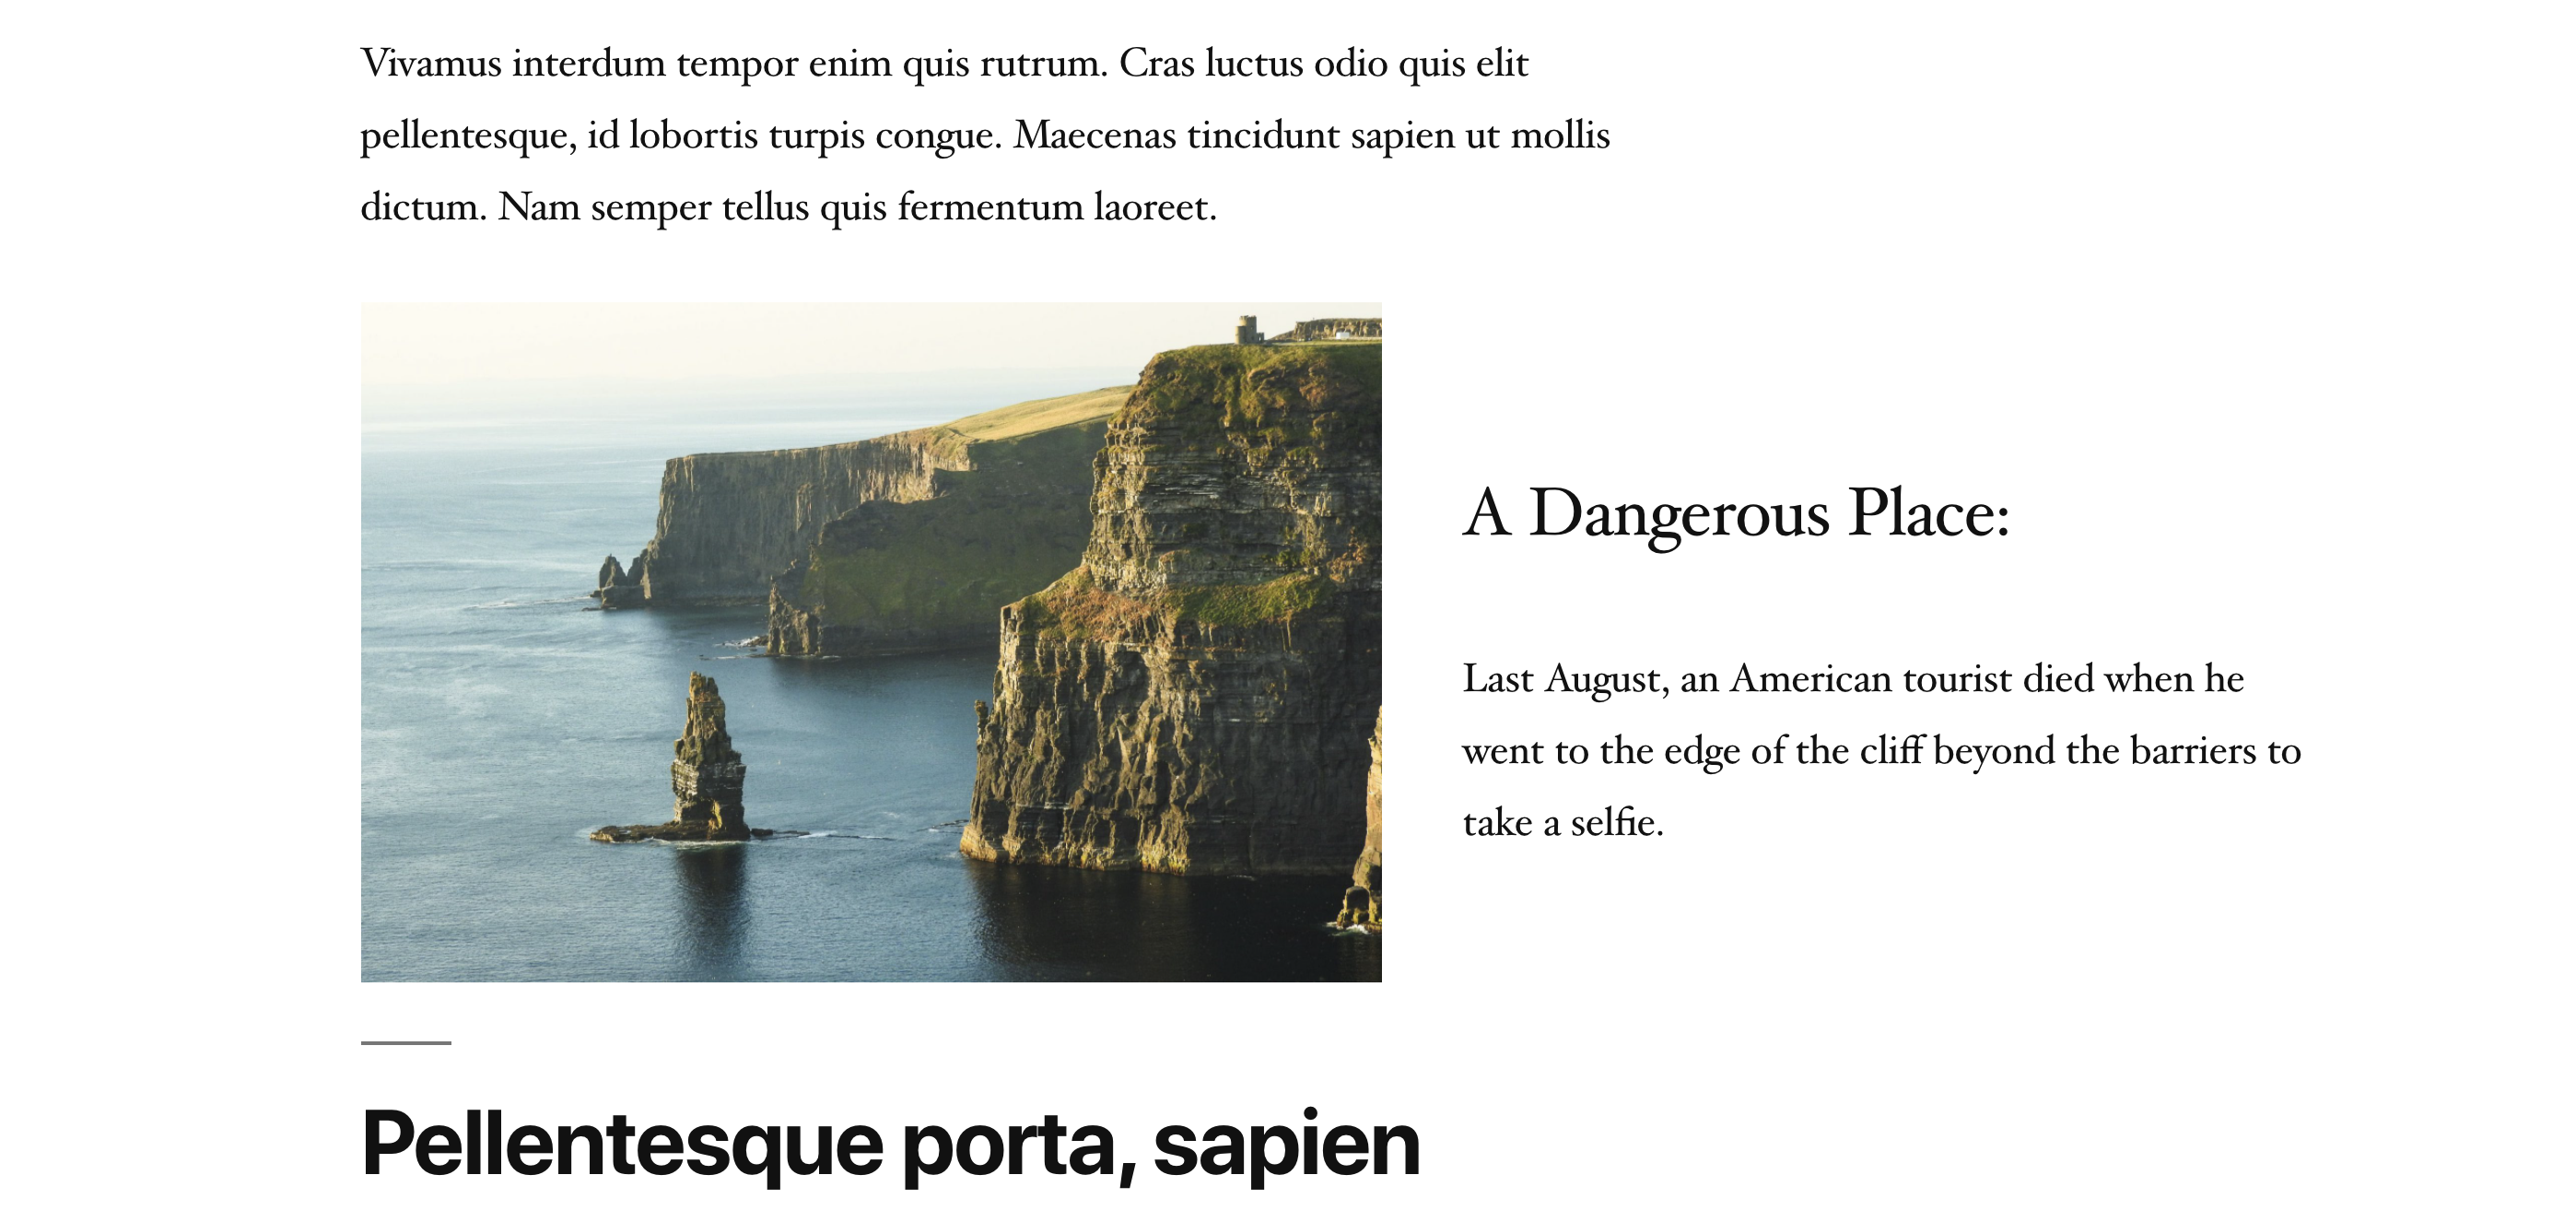
Add a tag of illustrated story to the page that you’ve used this block type on.
For the last post make the text in the media and text block be a verse block. Use a few lines from a poem or song you like.
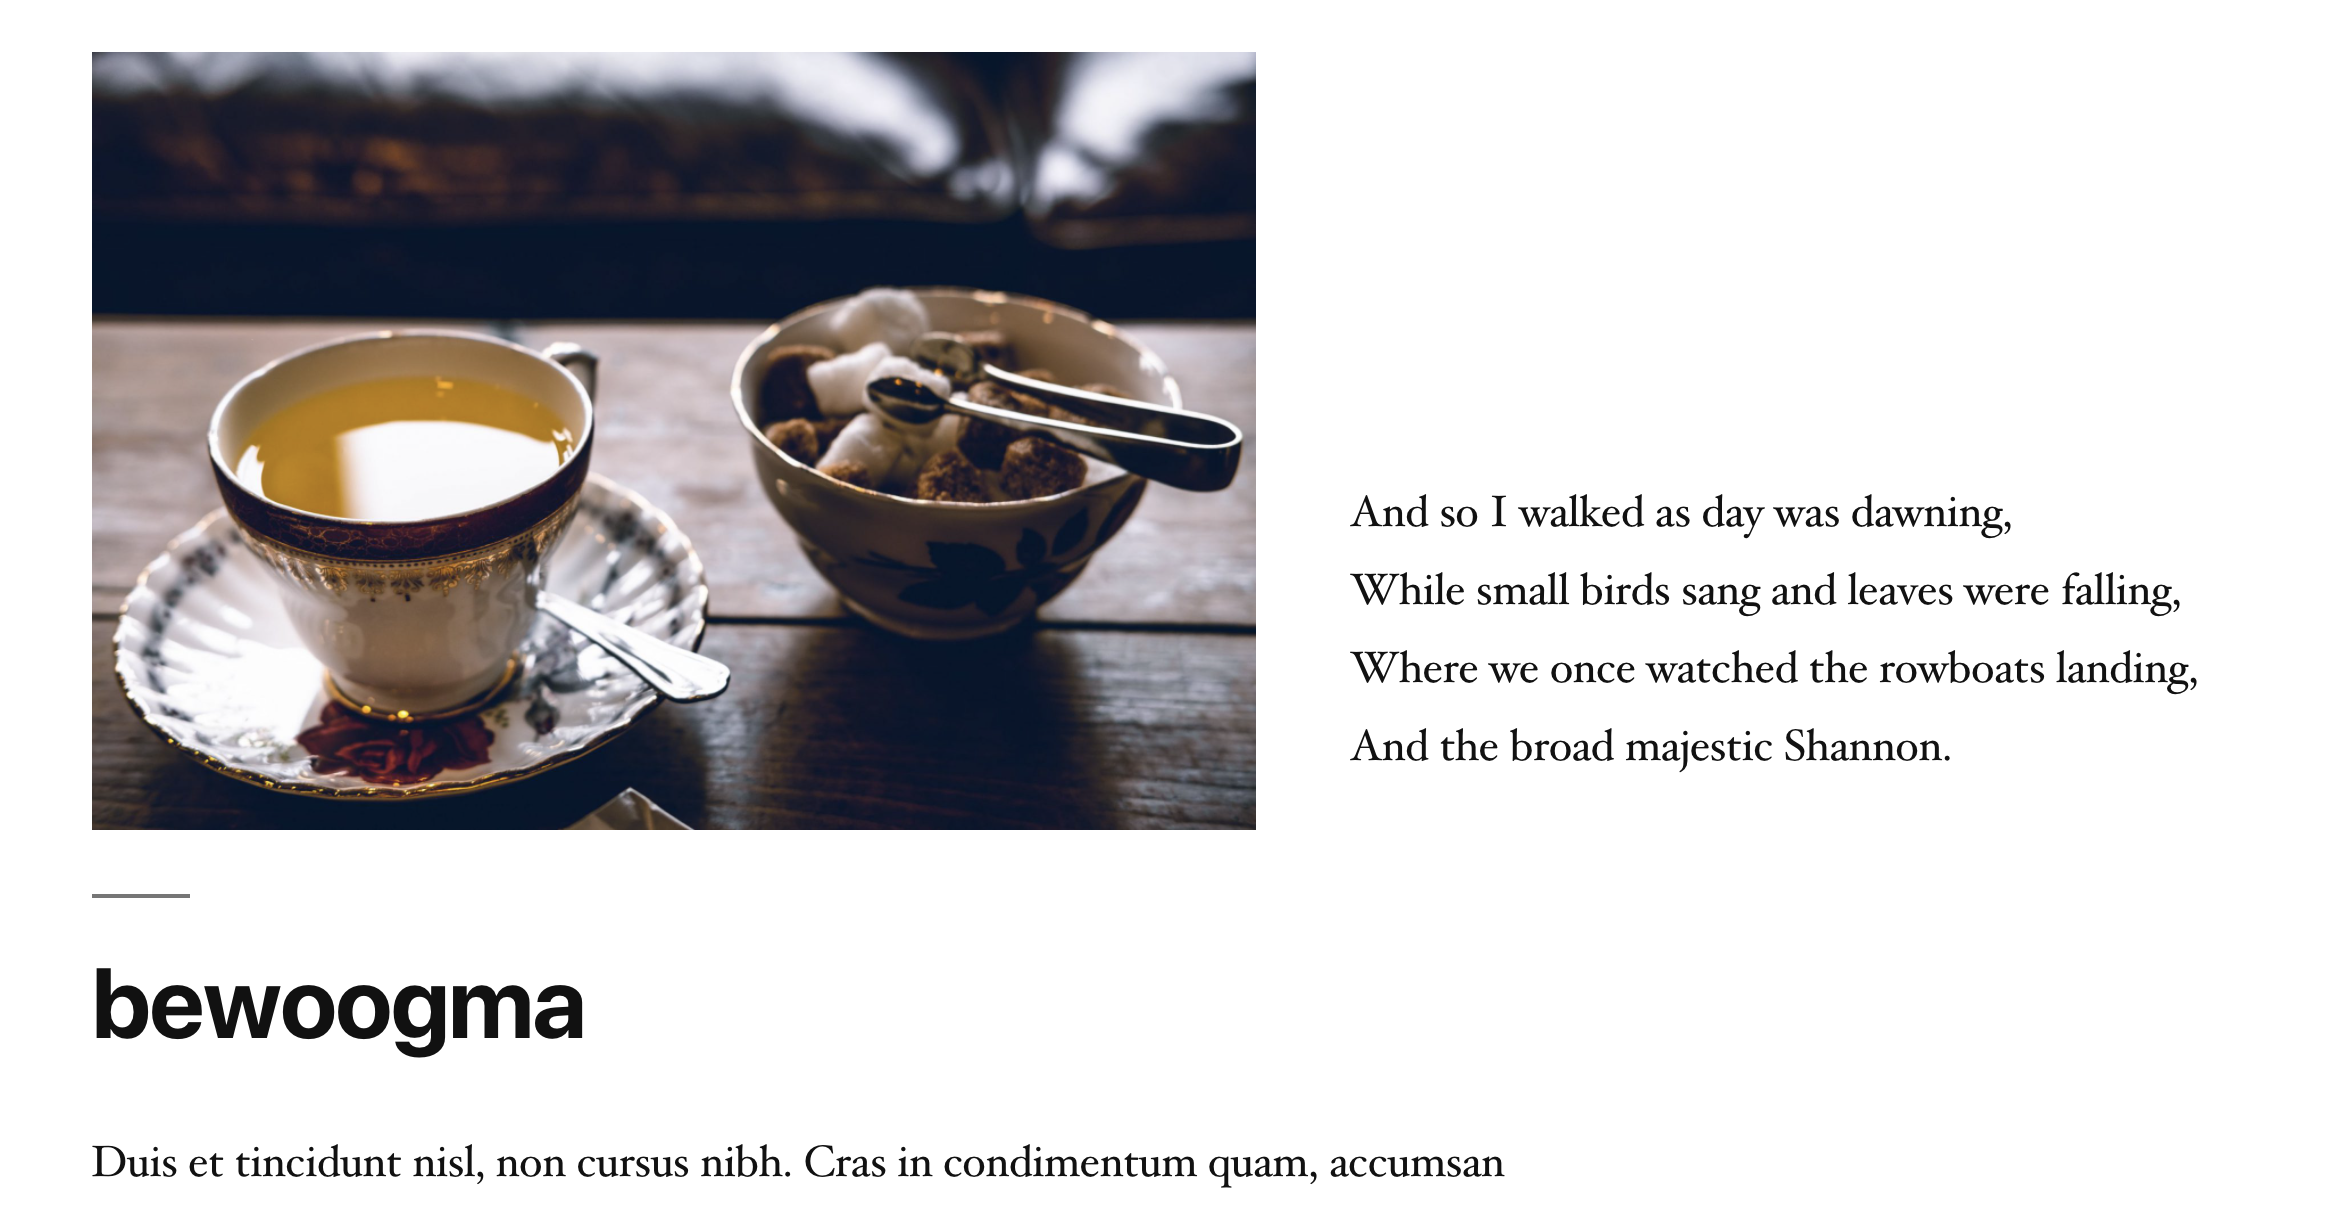
Make the verse align near the bottom of the picture. You do not need to use CSS to do this: the Gutenberg editor interface gives you all the control you need to do that.
If you can’t see the controls that let you do this, make sure that the media and text block is selected, not the nested verse block.
Add a tag of illustrated verse (not illustrated story) to this post.
As an aside, if you test the post in a browser and resize the page, you might see some unattractive alignment of content at some sizes. For now, don’t worry about that.
Add Galleries
Add a gallery to a post from each of the city categories. Put the 10 city images in it.
Make sure that when the user clicks on an image in the gallery, it opens the image up on its own in the browser window, like below.

With the first two images in the galleries, make sure that all the images have titles and alt attributes. Normally you would do this for all the images, but doing it for only the first two in each city category is fine for the assignment.
Add a tag of galleries to the pages that you have added a gallery to.
Back to the Home Page: Add a Table, a Button and Some Tweets
First, the table
On the About EE page (your home page) add a table to it with three columns and six rows. Make sure that the table has table headers (th). Put some data (of any sort) into the cells.
Next, some grouped tweets
This will use grouped blocks.
After the last paragraph, use the columns block to put two tweets side by side in the page. You can choose the tweets to use.
That means that you must use the columns block, and put twitter blocks inside them. (If you’re having trouble doing that, read the section just after this screenshot).

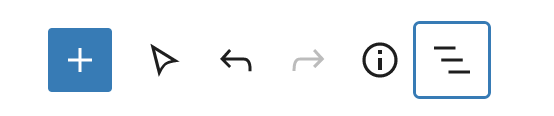
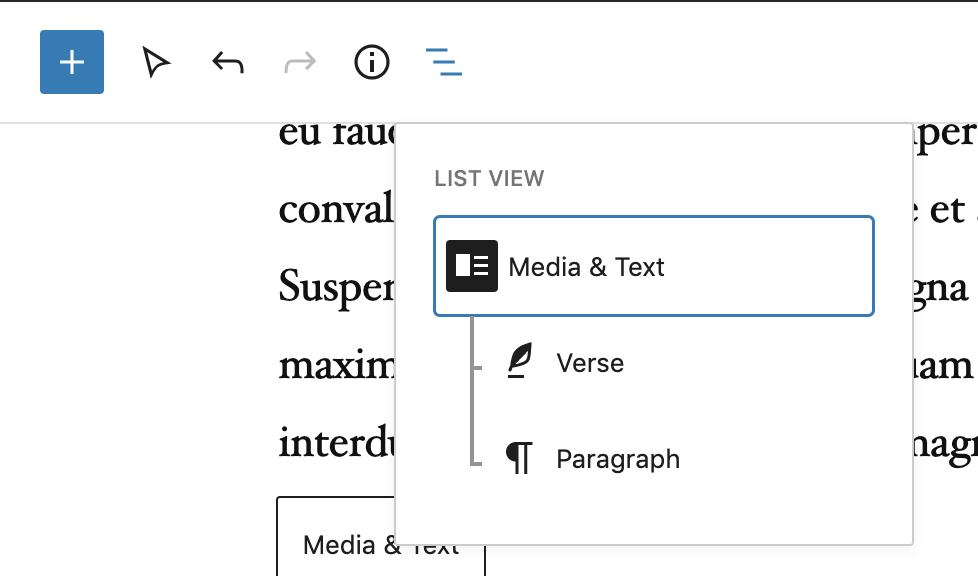
The Outline Tool
Sometimes it’s difficult to select items in a grouped block. A useful feature, the outline button, can help do that. It is at the top of the editing window:
When you click it, you get a clickable tree showing the inner blocks in a group block:
A button
Make a new page called Contact. Don’t worry about putting any content into it. When we learn how to use plugins, we’ll be able to very easily add a form to our pages or posts.
Now, after the second paragraph on the About EE page, add a buttons block with one button with the following characteristics:
- button text: contact.
- button behavior: takes the user to the contact page when clicked.
- button text color: white.
- button background color: custom gradient.
The colors in the gradient must be rgb(15,15,100) to rgb(15,15,175). - button alignment: centered
Make A Menu
Finally, make a menu to appear at the top and bottom of the website.
Make it have links with the following words:
- home
- name of city 1 (for example: Paris)
- name of city 2
- all articles
- contact
The home link needs to go to the home page of the site.
The contact link must like to the contact page you created.
The other links are to the categories. The all articles link text will link to the travel category.
Make the test of all these links lower case. Do not rename any pages or posts to do that, and don’t use CSS. Figure out how to do that in the menu area of the dashboard.
Test your menu. Make sure that all links work.
One More CSS Tweak
Test your site. In the menu, click on a city name.
That will take you to an archive of posts in that category: a listing of the posts categorized that way.
Now click on the title of one of those posts. That will take you to the single view: the post on its own.
If you do that, you’ll see the twentynineteen’s theme’s exquisite full-page treatment of the feature image.
However, I asked you at the beginning of the exercise to make a circular logo with a black background.
Twentynineteen’s treatment of that logo could be much nicer. Notice the white fringe?
Do the necessary CSS tweaks to change the logo treatment to look like this:
What to Hand In
IF you are a Langara Student:
All you need to do is hand in is some screenshots. Open the site in a browser and navigate to the appropriate pages and take full page screenshots.
Make sure that all the content is captured: Chrome in particular does not do a good job with full page screenshots.
At the very least, when you load any page, scroll down to the bottom so that any lazy-loaded images show up on the page.
But your mileage with browser screenshots may vary.
Another option is to use a full page screen capture extension for Chrome (such as Go Full Page).
Anyway, please hand in full page screenshots of all the following
- the home page
- a web page with the two videos and a pullquote
- a web page with the two wide images
- a web page with an illustrated story
- a web page with an illustrated verse
- a web page with a gallery
- a page with a single gallery image (ie the view of an image clicked from the gallery)
- a full screenshot of the Posts > All Posts area in the dashboard. This will show me your posts, categories, and tags.
When you’ve got these screenshots made, rename them with the text that’s in bold in the above list. For example, home-page.png, two-videos.png, etc.
Then please put them in a folder called yourname-essayist and then zip it and upload the zip to our hand in area.
As usual, that’s BrightSpace at Langara College, and our Moodle course shell at Emily Carr University of Art & Design.