In this exercise, we’ll go over how to add a custom controller to an HTML5 video element, while making sure we don’t disadvantage users without JavaScript.
First, please download these files. Unzip the package and open the folder up in your code editor.
You will see that I’ve given you an index file, and css, video, and javascript files (in their respective folders). In order to keep the download small, I haven’t included the non-mp4 video fallback formats that are referenced in the video code itself.
CSS Preparation
In the CSS file are a couple rudimentary styles for text and responsive video. We’ll add to them here.
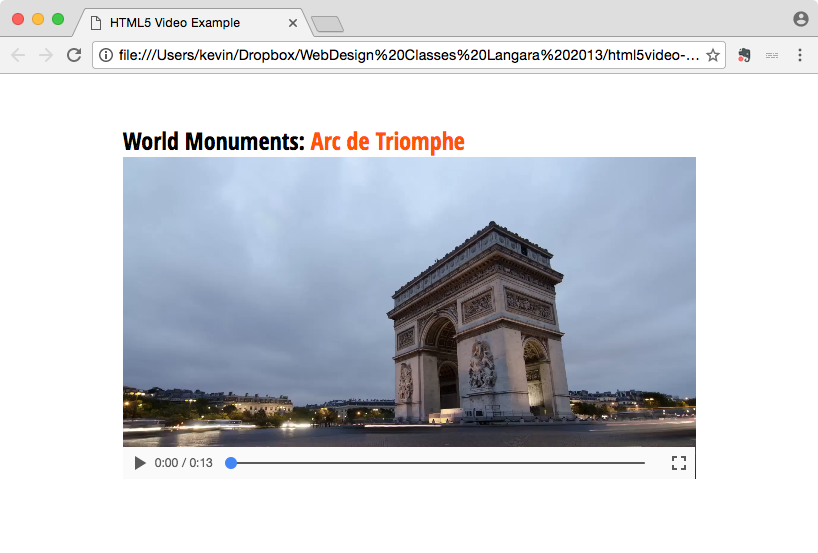
The HTML file starts simple, too. Test it in a browser. Resize the page to check that the responsive code is working.
Build the HTML Components
We will use JavaScript to turn off the native controller, but for now, turn it off by removing the controls attribute from the video element in the HTML. This will make it less obtrusive as we test our work.
After the video element but before the close of the .video-container element, add the following code
<div class="video-controls" id="video-controls">
   <button id="btn-play-stop" class="btn-play-stop">Play</button>

   <div class="progress-container">
     <div id="progress-value" class="progress-value"></div>
   </div>

   <div id="scoreboard" class="scoreboard">0%</div>

</div>
<!-- .video-controls -->
We are, in other words, making a box for the controller, a PLAY button, a box (.progress-container’) with another box inside it which will act as a slider element, and a box (.scoreboard) in which we will update the percentage of the video played.
An Aside…
You might be wondering why I am not using the HTML5 Progress element for the slider. It’s perfectly reasonable to do so, and perfect semantic. However, it is very difficult to style the progress element consistently cross-browser, so I’m making something that will look like a progress bar. We lose a bit of semantics here, but gain greater CSS control.
You might also wonder why I’m using IDs here. It just makes it easier to select the element knowing that it is the only one in the page. However, if I had multiple videos on the page, I would have to use classes, or different IDs. However, since IDs trump classes in the CSS cascade, if I do all my styling with classes rather than IDs I won’t have to worry about that issue.
Style The Controller
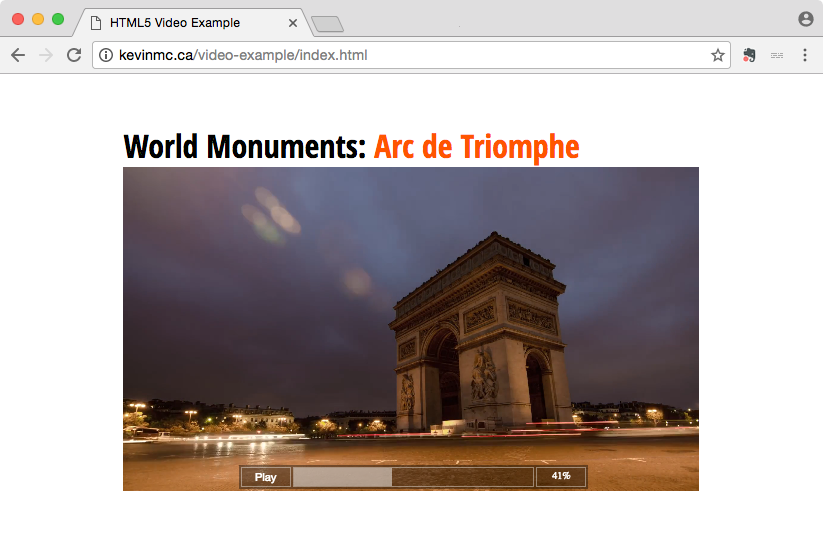
We are going to want the controller to look like this:
Add the following code to your stylesheet. ( Don’t worry if there are minor differences in appearance ).
/* Video Player =========*/

.video-container {
   position: relative;
}

.video-controls {
   width: 70%;
   background-color: rgba(0,0,0,.5);

   position: absolute;
   bottom: 10px;
   left: 15%;
}

.btn-play-stop, .progress-container, .scoreboard {

   border: 1px solid rgba(255,255,255, .6);
   height: 20px;
   width: 9%;
   margin: .5%;

   float: left;

   box-sizing: border-box;
}

.progress-container {
   width: 79%;
}

.progress-value {
   width: 20%;
   height: 100%;
   background-color: rgba(255,255,255,.2);

}

.btn-play-stop {
   background-color: black;
   color: white;
}

.btn-play-stop:hover,  .btn-play-stop:focus{
   color: white;
   outline: #f50 solid 1px;
   border: #f50 solid 1px;;
   background-color: rgba(0, 0, 0, .6)
}


.scoreboard {
   color: white;
   font-size: 15px;
   line-height: 20px;
   text-align: right;
   padding-right: 6px;
}
What we are doing here is the setting the .video-container as the positioning content for the controller, then putting the controller almost at the bottom of the video-container. The rest of the code should make sense.
If you’re not seeing the background-color on the .video-controls element, remember that its children are floated, so you need to add the clearfix class to it (clearfix is included in the stylesheet).
We will also change the width of the progress-value element. We’re giving it 20% here so we can see what it will look like in action.
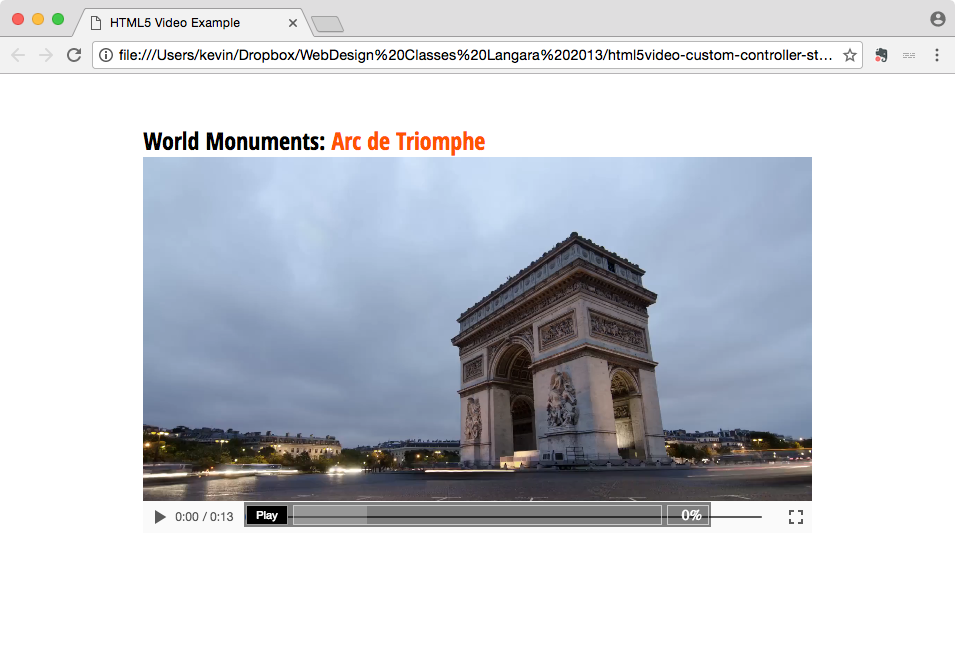
Finally, in the HTML file add the controls attribute back to the video element. Remember that it is a single-word attribute rather than an attribute= “value” type of syntax.
So now we see our custom controls sitting on top of the “native” controls:
Add The JavaScript
So now, let’s turn to the JavaScript. The downloaded HTML file has a link to the blank JS file: video-controls.js. Open that file.
First, let’s select the elements we want to work with and store each in a variable, then remove the video player’s native controls:
var videoPlayer = document.getElementById('video-player');
var btnPlayStop = document.getElementById('btn-play-stop');
var progressValue = document.getElementById('progress-value');
var scoreboard = document.getElementById('scoreboard');

videoPlayer.controls = false;
Now let’s wire up an EventListener for our button:
 btnPlayStop.addEventListener('click', function(){

	if ( videoPlayer.paused || videoPlayer.ended ) {
		videoPlayer.play();
		btnPlayStop.innerHTML = "Stop";
	}
	else {
		videoPlayer.pause();
		btnPlayStop.innerHTML = "Play";
	}

	videoPlayer.classList.toggle('playing');

	});
You will probably want to build the above in stages, but I’ll explain what’s happening. We want the button to be multi-functional: if the video is playing, the click event should stop it, but if it is paused or completed, the click event must start playback. The button text must change to reflect what will happen when the button is clicked.
If you’re wondering about which methods are available, consult the Mozilla Developer Network page on the HTMLMediaElement API.
The last line in the script will toggle a class on and off the videoPlayer using the classList property. ( We might or might not use this later in the exercise….)
So test the page. You should see that the button text does change and the video does play or stop on click.
Make the “Progress” Slider Work
To make the slider work, we will use the timeupdate event, which fires when the currentTime property is updated. Every time the browser updates that value, we will determine what percentage of the entire video (videoPlayer.duration) has been played. Then we will update the scoreboard and increase the width of the progress-value div.
videoPlayer.addEventListener('timeupdate', updateProgress);

function updateProgress() {

var percentPlayed = Math.round( ( videoPlayer.currentTime / videoPlayer.duration ) * 100 ) + "%";

scoreboard.innerHTML = percentPlayed;
progressValue.style.width = percentPlayed;

if (percentPlayed == "100%"){
   btnPlayStop.innerHTML = "Play";
}

}
The last part tests if we’ve reached the end of the video: if so, it changes the button text.
Additional Things We Could Do
Ways we could refine this rather basic controller:
- Add Volume controls
- Add a FullScreen button
- Leverage the canplaythrough event, to see if enough data has downloaded to allow uninterrupted playthrough. Display a “loading” animation while waiting for that event to fire.
More on the HTMLMediaElement API.
I will add to this discussion at a later date, but at this point I have time only to add a final feature: showing and hiding the controller.
Hiding the Controller
In your CSS, change the bottom value on the .video-controls to a value like -30px. This will push the controller beyond the bottom edge of the video. To hide it, add overflow:hidden; to your .video-container style.
Now add the following CSS:
.video-container:hover .video-controls, .video-container:focus .video-controls {
   bottom: 10px;
}

.video-controls:blur {
   bottom: 30px;
}
This means that when a user hovers over the video, the controller will be displayed. As well, if a user tabs to the video, the controls will display (the focus state). Finally, when the video loses focus (either by the mouse no longer hovering over the video, or by the user focussing elsewhere via keyboard events).
Of course, we could also add transition: bottom .5s to our .video-controls class, in order to smoothen the transition between the two states.
Here, though, you may encounter an interesting issue: a strange effect wherein the controller appears just a tiny bit before it’s over the video.
To see why, put a border on the video-container element. Now look closely at the bottom border: notice how the video isn’t coming right to the border?
This effect also happens with images.
The solution?
Add Display: block; to your video style.