NOTE: in this exercise, do not edit any theme template files (ie don’t use Appearance > Theme Editor) or install any plugins other than those used in the assignment.
The Duplicator plugin is included in the files you will download below.
Any CSS changes you make in your site should go in the Customizer.
Task One: Installing Your Site, Pt 1
- Download the content. Unzip the file.
- Inside the unzipped folder will be a folder called wp-configuration-exercise-big-2021. Put it in /Applications/MAMP/htdocs
- Rename the folder to wpconfigurationexercise.
- Start up MAMP.
- In phpMyAdmin, make a new database called wpconfigurationexercise
- Go to your web folder URL (Mac: localhost:8888 or localhost)
- Click the link to the wpconfigurationexercise folder
Task Two: Running Duplicator
In the downloaded material is a file called installer.php and a zip file with a name with a lot of numbers in it (the name of the archive will be different from what’s in the screenshot below, but don’t worry). You will see links to both in your web browser.
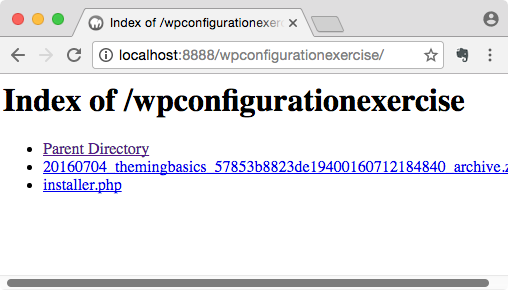
These files are created with a very useful plugin called Duplicator, which allows you to move WordPress sites very easily. Click on the installer.php link.
This will take you to step one of the deployment.
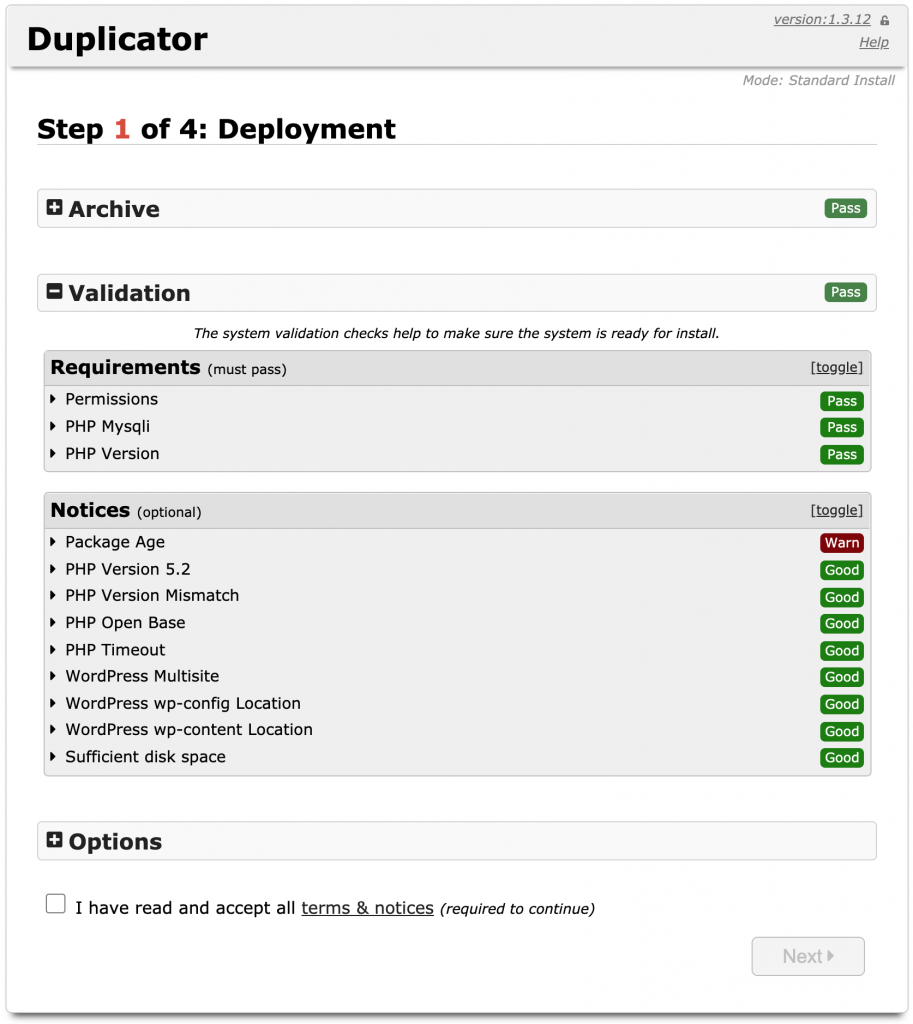
Here, Duplicator will run some tests to see if the site is in fact installable in your environment. It is not unusual at this point to see an occasional warning. In the screenshot below, Duplicator is warning us that the package is old, for example. But it’s just a warning.
The package used in this exercise might contain a slightly older version of the Duplicator plugin: if you later use a newer version, you may see a few cosmetic differences, and the addition of an extra feature or two.
Click the I have read and accept… text and then click Next.
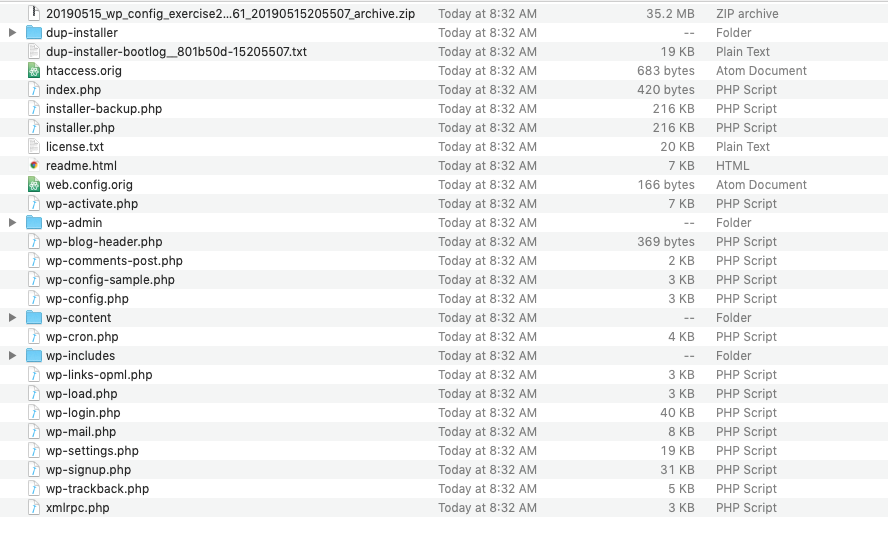
This will cause Duplicator to extract all the files from the packaged site. If you look into the site folder now in htdocs, you’ll see that where there used to just be the installer and the single archive, there are now many files:
Anyway, back to Duplicator.
In step two of the deployment, we will install the site content into a database.
Here, input the name of the database, the database user, and the database password. This are the same settings we would use to setup WordPress to connect to the database in a “manual” MAMP installation.
Be sure to click Connect and Remove All Data rather than Create New Database (the former approach is more widely supported).
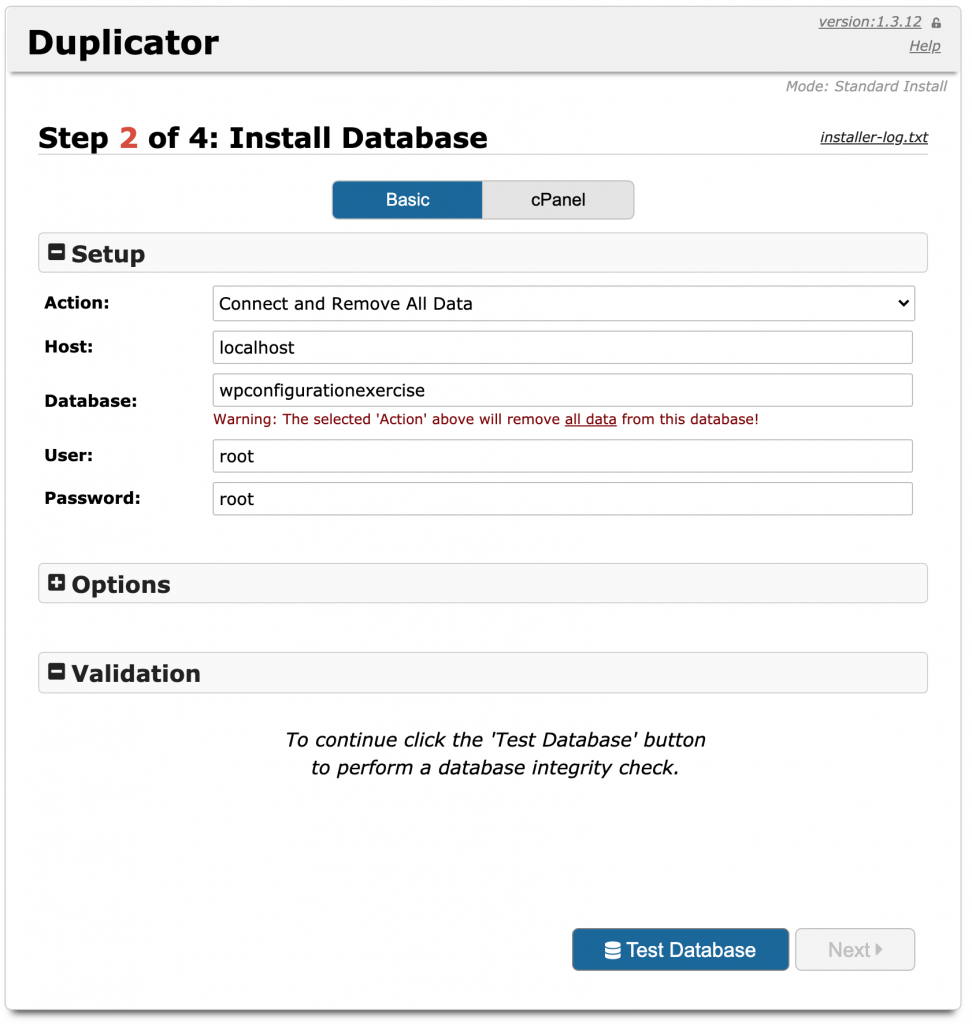
Click Test Database.
If you’ve entered the correct information above, you should see the following:

Click Next.
You will here be asked to confirm that you want to run the installation. Click OK.
This will take you to Step 3 of the Duplicator Process: Updating the Data.
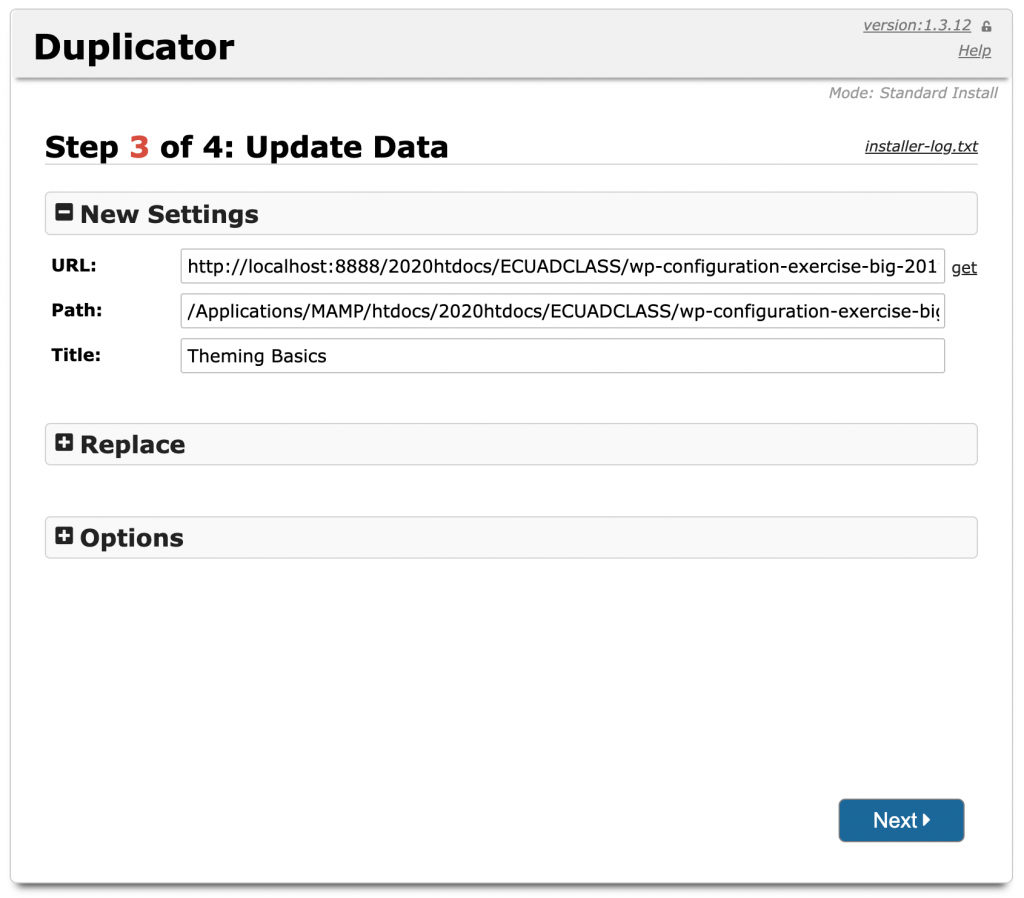
Here, we need to create an account for you on this transferred WordPress site.
To do that, click on Options, and select the Admin Account tab, if it’s not automatically selected for you.
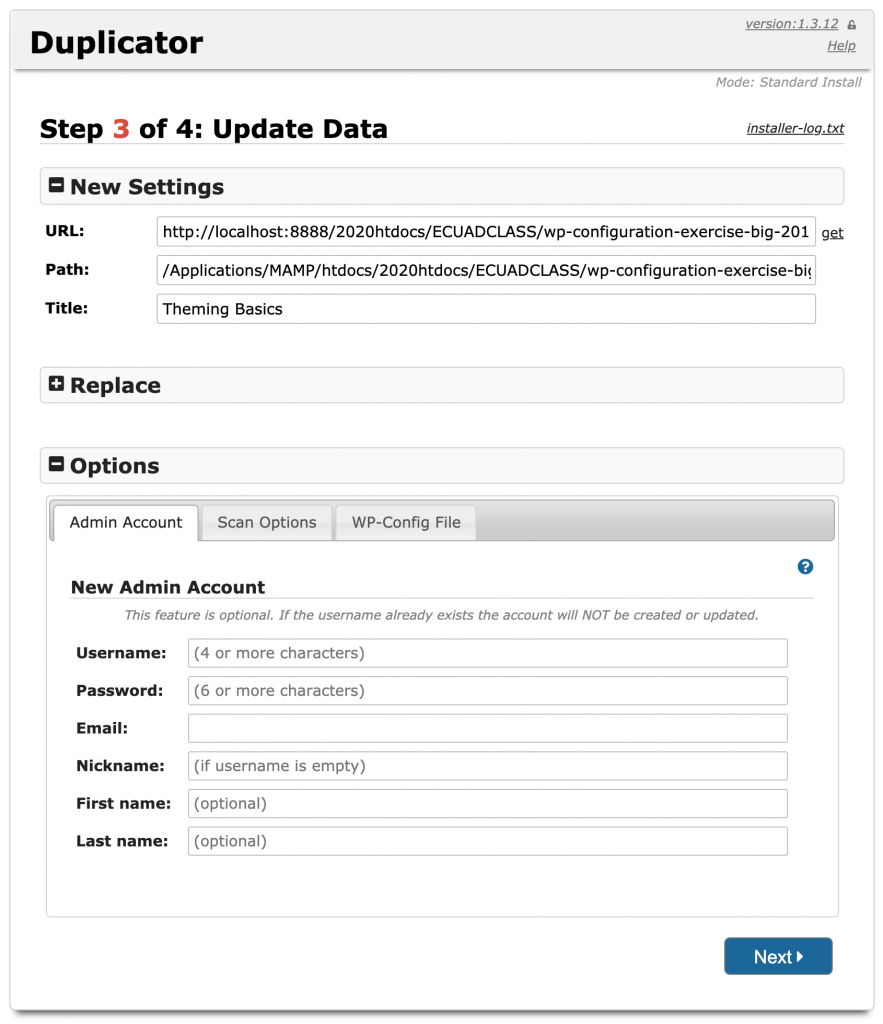
Make a New Admin Account with your name as user and password.
(It goes without saying, hopefully, that on a site that were live on the Internet, you would definitely need a more complex username and password).
Click Next.
This will take us to the final step: logging in and testing the site. Make sure that you click on Auto delete installer files after login, if it’s not already selected.
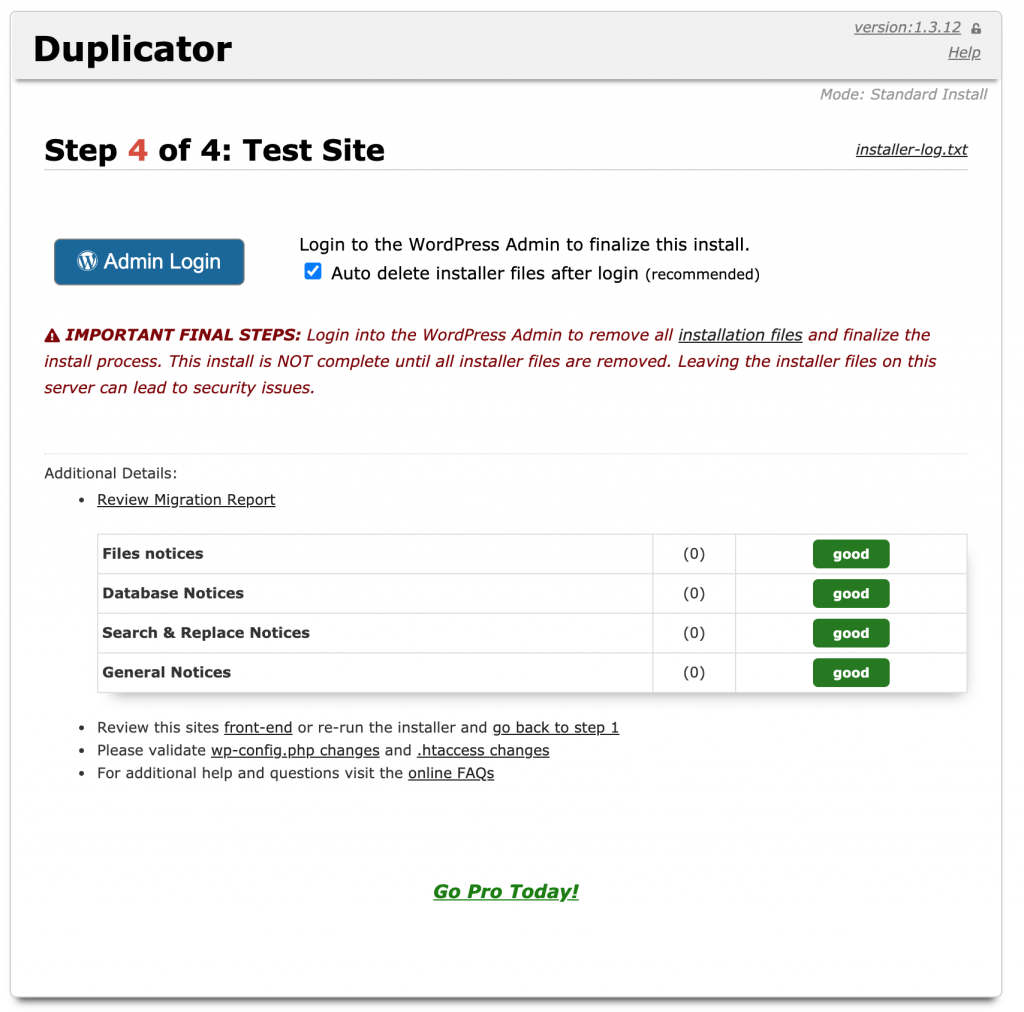
An Aside: Installation Cleanup
After you log into the site, Duplicator might show a message at the top of the dashboard. It could look like this:
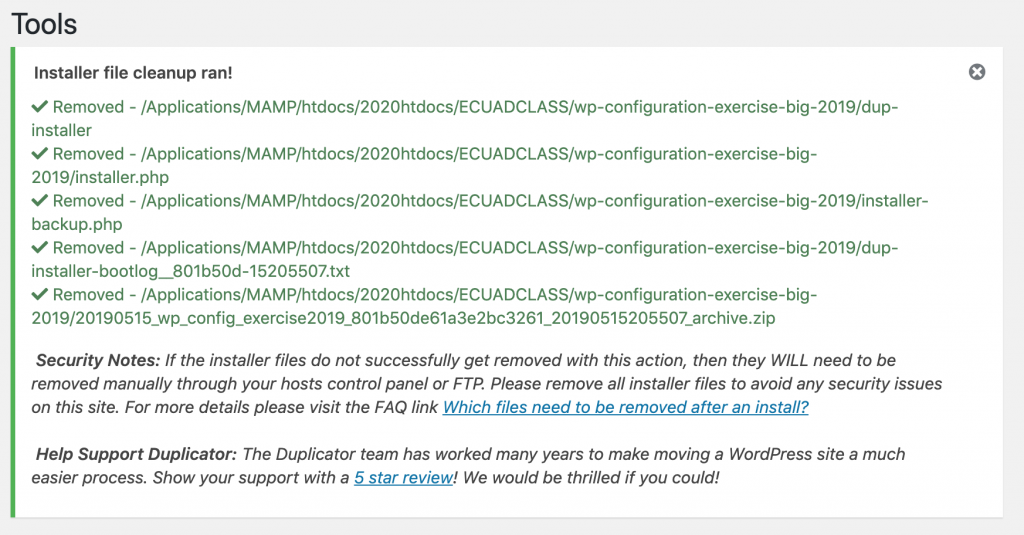
Here, Duplicator is reporting that it was able to delete the installer files. This means that the installation is complete, and you can now test the site.
The next two are from situations where Duplicator was not able to remove them. If this is the case, you will need to remove them manually.


We do this because there is site content, such as user data, in the site you’re moving: you wouldn’t want an archive of it to fall into the wrong hands.
As well, if this were a live site, you wouldn’t want someone to run the installer.php file again, right?
If manual removal is needed, go on your computer to the root level of your WordPress installation. In this case it would be in htdocs/wpconfigurationexercise.

Ultimately, then, it is important to make sure that the installer files are removed for two reasons:
- security: the archive file contains the database, which you do not want anyone to be able to discover
- file size: if you make a new Duplicator package of your site to move it or just back it up, you don’t want the previous archive to be inside the new archive (since it will double the size of your Duplicator archive).
Step Three: Update WordPress & Plugins
In the Dashboard, click Dashboard. Yes, I know that sounds strange: it’s at the top of the sidebar. This will reveal the Updates area.
Click on Updates.
First, update any plugins that need updating.
Finally, update WordPress itself.
Task Four: Change Themes and Clean Up the Theme Area
The currently active theme in this installation is probably twentysixteen. Change to the twentytwentyone theme.
Figure out how to delete the following themes from the site:
- twentyfourteen
- twentyfifteen
- twentysixteen
- twentyseventeen
- twentynineteen
It is always a good security practice to delete any unused plugins or themes—since every piece of any code (in and out of WordPress) is a potential point of vulnerability.
It’s, however, a good idea to keep one or two of the default themes to use for troubleshooting if something goes wrong with your main theme.
Specifically, the theme now outputs descriptions on category links.
Task Five: Install a Contact Form Plugin
Install and activate the Contact Form 7 plugin. You can do that from the Dashboard Plugins area with the Add New button.
When you search for a plugin, examine the results that are returned. With Contact Form 7, for example, we see the following:
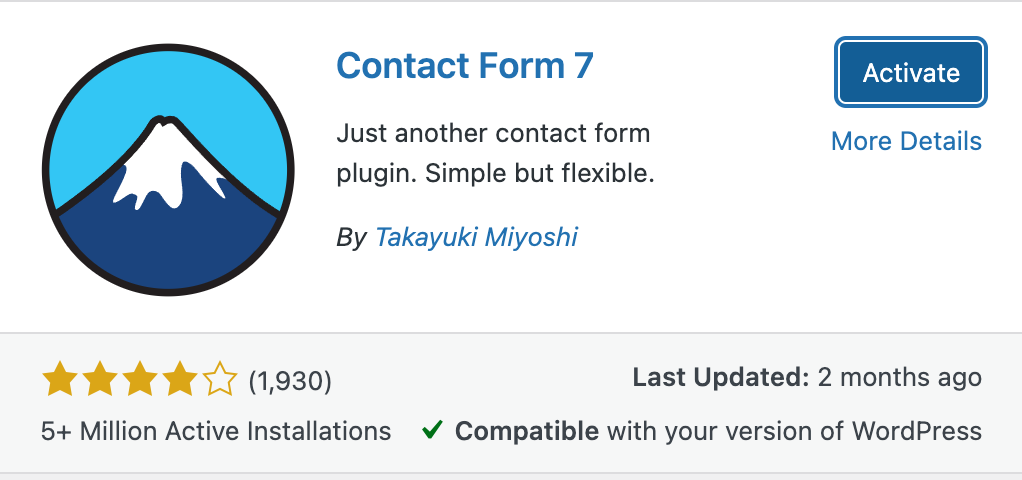
We learn some useful things from this:
- Contact Form 7 is very popular, with more than 5 million installations
- It is compatible with our version of WP
- It is in active development
- Users have rated it highly
If a plugin has few installations, or hasn’t been updated within the last year or two, consider searching for a different one to do the job you are looking for it to do.
Install Contact Form 7, and then activate it.
When you install CF7, it might ask you to set up an Akismet account. At this point, don’t do that, but it is very much recommended to do so on any live site that has any kind of form: Akismet will scan for spam all submissions submitted via forms on your site — which every site will get.
Now figure out how to make a simple contact form: there will be an area in the Dashboard to do this.
Then put that contact form into a page (not a post) called Contact Us.
Hint: to put your new form into a page, use the best keyboard shortcut in the history of the world: /
Task Six: Add the Contact Us Page and Home Link to the Menu and Activate It
Put a link to that page in the menu that is at the top of the screen. There are two menus already built in the site you’ve downloaded.
Make sure you remove the link to Contact ( you’re replacing the old Contact custom link with the new Contact Us page link ).
Make sure that the text in the menu for the contact page is Contact and not Contact Us.
If the menu isn’t the active one, activate it.
Task Six and a Half: Fix An Ugly Menu Issue
In an update to this theme that came in late 2022, a small part of the design changed, and it had really unfortunate consequences for our menu layout.
I suspect that this will be fixed very quickly: if might be fixed by the time you read this.
If the menu area is exceptional ugly and confused (as in the screenshot below), it hasn’t been fixed. If it doesn’t look like this, skip ahead to section seven.
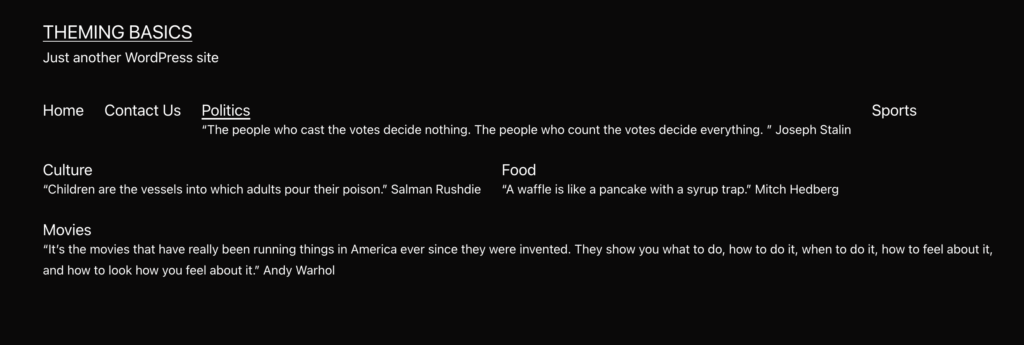
The problem here is that when Categories are used in a menu, the theme now outputs quotations along with the category link.
To understand what is happening here, go to Posts > Categories. Here you will notice that most of the categories have descriptions added.
This is a useful feature because it allows a theme to output additional information on category archives (the pages that are generated when you click a category link).
Because you will work with those descriptions in Task Twelve (and we still want the descriptions to remain in the archive pages), we can’t just delete these descriptions to make them not appear in the menu.
Instead, use CSS to hide that content in the menu. Use the browser Inspector to work out which item to target. When you’ve figured this out, add the code to the Custom CSS area of the Customizer.
HINT: this is easier if you open the site in one window and use the Inspector there (without the Customizer being open in that wind0w).
The Customize UI adds a lot more HTML to the page, which makes it more complicated to see what you’re looking for.
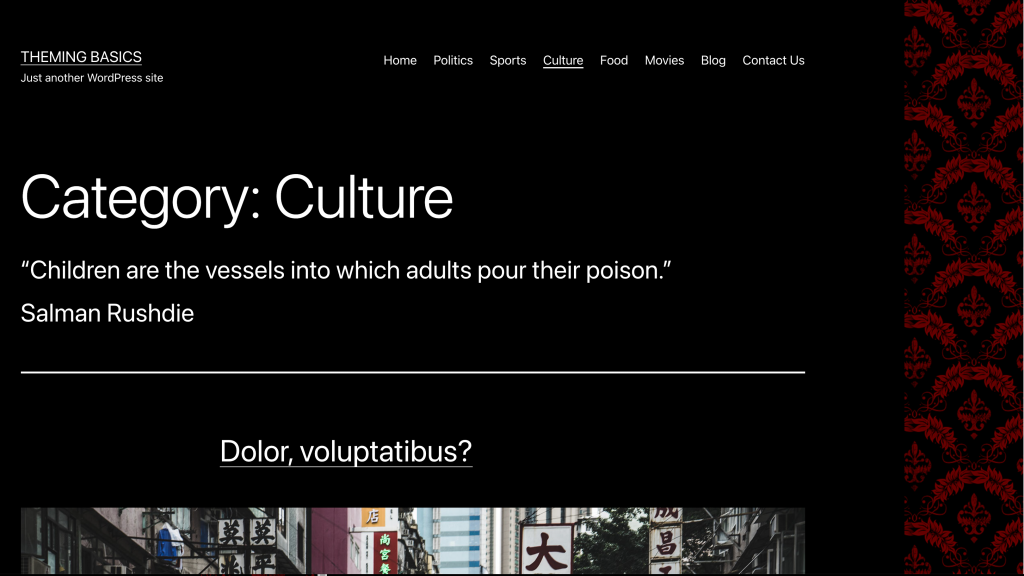
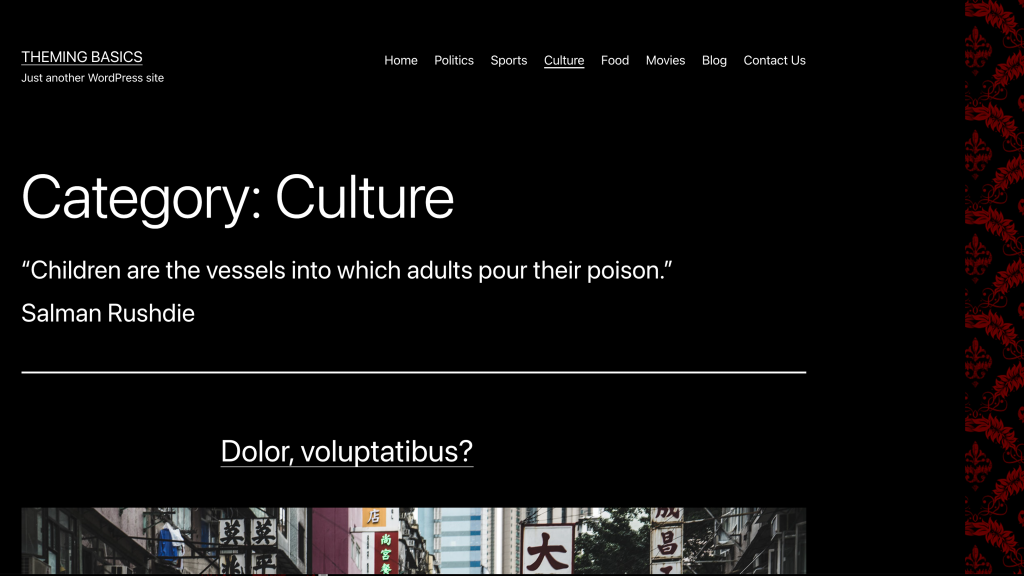
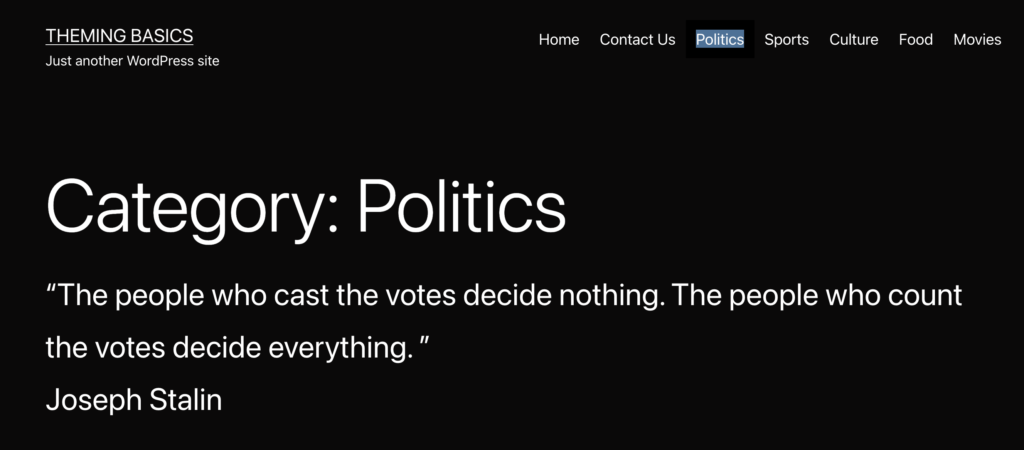
Here is what the top of the site should look like (the screenshot is in a Category archive, so that’s why you see the quotation after the large Category: Politics title.
Task Seven: Set a Static Home Page and a “Blog Page”
WordPress always comes with one post and one page of sample content.
Use the Customizer to set the page called Sample Page to be the first page of your website.
Add a HOME link to the menu, too. It must take you to the front page of the site.
Figure out how to make a link to Blog in the menu. When a user clicks this link, they will see all the latest blog posts. Make sure that this link is the second from the end of the menu, and that Contact Us is the last link.
Note: the content in the Sample Page is what’s known as a Classic Block. A classic block was made before the introduction of the Gutenberg editor to WordPress. To convert a Classic Block to Gutenberg Blocks, open the post, click on CLASSIC and choose Convert to blocks.
Task Eight: Color Change
Set the background color of the site to black.
Task Nine: Add A Background Pattern
Go to DINPattern.com and download all the patterns (the download everything here link). From the downloaded files, find the file entitled battle-royale and set it as the background image of the website. You can do this in the dashboard, in the theme customizer.
Make the background pattern repeat down the right side of the page only (ie vertically, not horizontally). That will take some custom CSS.
You can access the Custom CSS area in the Customizer.
In other words, most of the background of the site will still be black: the image will only be on the far right side.
Make the necessary Custom CSS to make sure that this background image appears only when the window is at least 1500px wide.
Finally, make the necessary Custom CSS to make sure that only exactly half of the image shows on screen (when visible at all).
Hint 1: background-position-x
Hint 2: calc( )
Task Ten: Add A Site Logo
Download these two images (just right-click to save them) and use the white one for a site logo at the top of the page and the black one for the site icon (favicon).
This is what the logo will look like in the page:

Make the necessary adjustment in the Customizer to have the top of the page appear like this:

Note: that’s not a CSS change.
Task Eleven: Widget Configuration
Widgets are little “things” that let you add functionality to your site. Themes will typically make one or more areas in which the user can select widgets such as a search bar, a text or image block, a listing of recents, or a listing of categories, etc.
These areas were traditionally put in a sidebar of the site, but you will commonly find footer or header widget areas as well. This theme, for example, puts its widget area at the bottom of the page, not the side.
In August 2021, WordPress changed its widget format (so that widgets now will use Gutenberg blocks). If you have used widgets before then, the interface has changed but the concept is still the same.
Themes that have Full Site Editing (as of early 2023, there’s about 200 of them in the WP Theme Directory, as opposed to the approximately 5000 “classic” themes) do away with the widget area entirely.
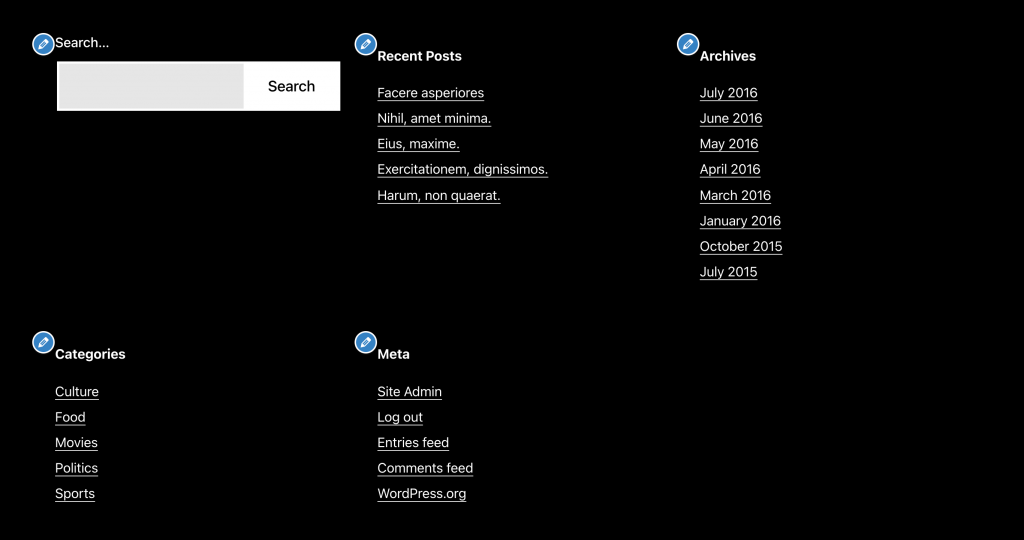
This is the theme’s default widget configuration, just above the footer:
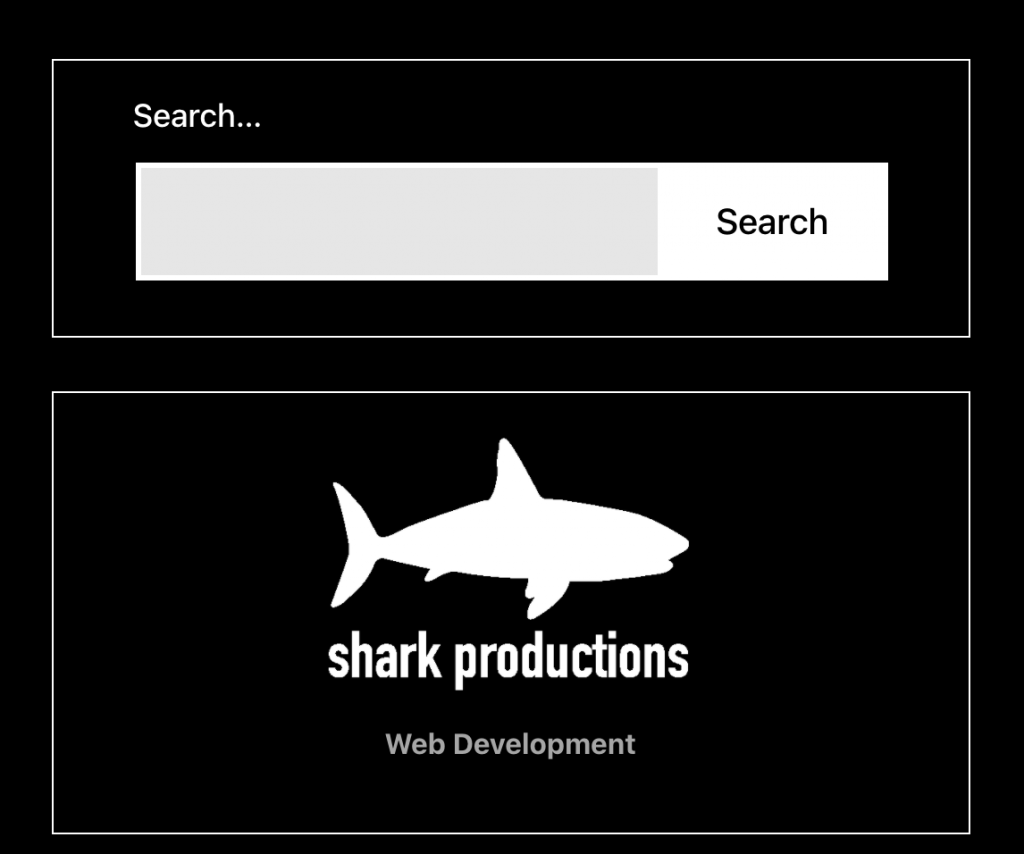
Change it to look like this (wide screens)

And like this (narrow screens).
You can access widgets from the Customizer, or from the Appearance section of the Dashboard.
However, if you go Appearance > Widgets, the UI gives significantly more room to work than if you go Appearance > Customize > Widgets.
To make the above changes, you will need to:
- Delete some of the default widgets
- Download the shark productions logo (below), putting it into an image block widget.
- Scale the image down using the controls inside the widget: this will take some experimentation. By scaling down, you will be increasing the effective resolution, and thus fixing the very jaggy quality of this logo (made in about 2 minutes at least ten years ago).
- Make the shark productions image a link to Langara or Emily Carr.
- Make the necessary CSS changes to add the borders and responsive alignments seen in the screenshots above.

Task Twelve: Quotation
If you click on Politics, Food, or Culture in the menu, you will see a quotation at the top of the Category Archive page that loads.
But if you click on Sports, you will notice that there is not a quotation in that section. Figure out how to add the following text to it (you don’t need the quotation mark seen here.
It isn’t the mountains ahead to climb that wear you out, it’s the pebble in your shoe.
– Muhammad Ali
Task Thirteen: Modify the Contact Form
Figure out how to modify your contact form to also include a question like Can We Send You Spam? like in the screenshot below:
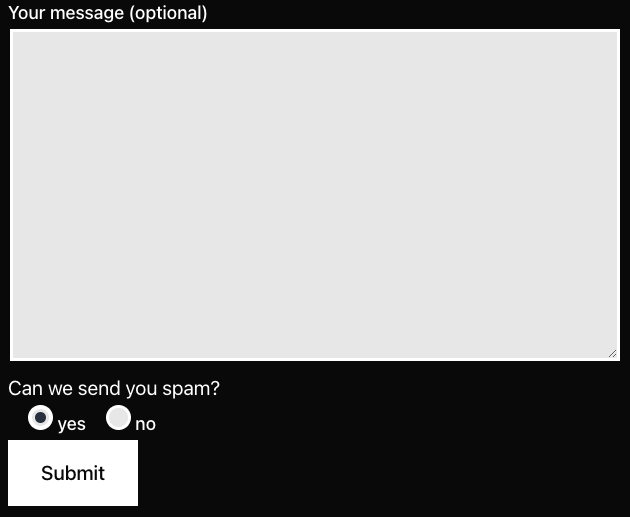
These two web pages will help you figure out how to do this:
Finally, write some custom css to fix the rather ugly default spacing and alignment of the newly-added radio buttons:
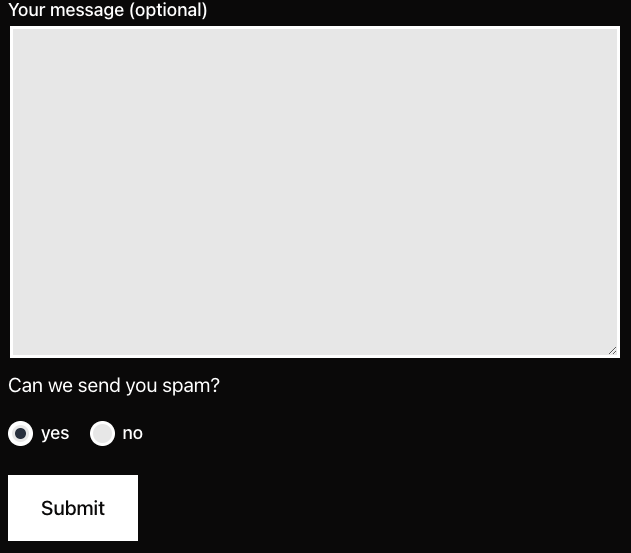
In making these css changes, definitely use the Chrome Inspector to figure out what to target.
In doing that you might notice a span with a data- attribute. An excellent discussion of how these attributes work, and how to style with them, can be found in this CSS Tricks webpage.
Task Fourteen: More CSS Modifications
In the CSS area of the Theme Customizer, add code to do the following.
HINT: this is easier if you open the site in one window and use the Inspector there. The Customize UI adds a lot more HTML to the page, which makes it more complicated to see what you’re looking for.
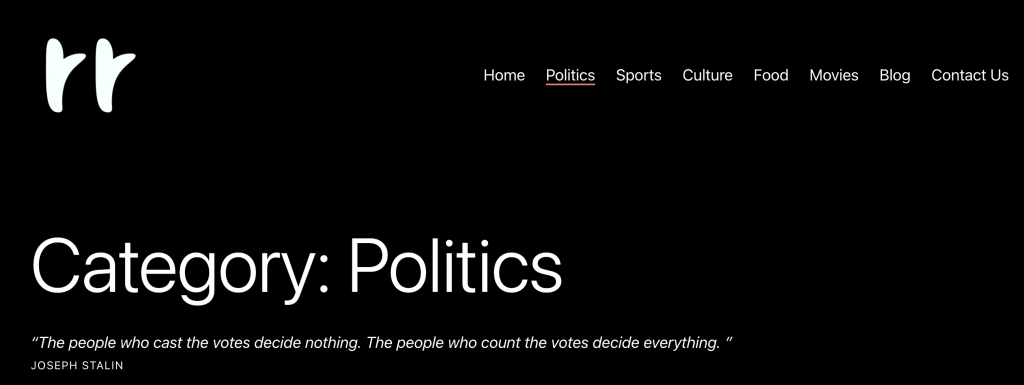
- Make the quotations at the top of category archives 1.25rem and italicized.
- Make the name of the person quoted .875rem set in uppercase with looser letter-spacing than the default.
- When on category archives pages (such as sports or culture or food), make the self-referential menu item have a lightcoral line underneath them:
(By self-referential, I mean links that go to the same page you are on: they indicate where in the site you are).
The above changes are illustrated below:
Task Fifteen: Investigating Excerpts
Now click on Blog in the menu. This will take you to the listing of posts.
Scroll through the posts.
You will notice here that right after each post’s feature image, there is a paragraph of text. For the first post, that text will be the following:
The Vexter Fuzz Factory is a five-knob fuzz using two new old-stock sixties germanium transistors. It’s one of the most versatile Fuzz pedals on the market. Its circuit is not modeled after any classic fuzz design.
Click on the title or feature image of the most recent post: it will be at the top of the output of posts.
This will take you full (or “single”) view of the post. Here, you will notice that the paragraph you saw on the blog page is not visible.
That text came from the Excerpt field. An except is usually a summary of the content that you write. Not all themes will output summaries, but lots do.
Excerpts typically make for a more pleasant reading experience than using any of the following:
- full content of all the post in the blog, home, page, or category archives.
- more buttons after the first paragraph
- summaries generated automatically by WordPress (by default the first 55 words in the post)
Click the Edit Post button at the top of the page (as long as you are logged in, of course).
Now figure out how to change the excerpt for the first post in the blog listing to
My name is [ your name ] and I created this excerpt. Excerpts are hand-crafted summaries of post contents. They typically work better than automatically-generated summaries.
Test that the excerpt is working, by clicking the blog link in the menu.
Task Sixteen: Final CSS Tweaks
For the final css tweaks, click on Politics to go to the archive of all the posts from the politics category.
In the top part of the politics archive, change the color of the word politics to hotpink.
Change the corresponding category names to the following colors:
| Archive | Category Text Color |
|---|---|
| Politics | hotpink |
| Sports | orange |
| Culture | yellow |
| Food | cornflowerblue |
| Movies | darkseagreen |


These tasks will require some custom CSS.
Big Hint: the body tag is your friend here….
Task Seventeen
There is no task seventeen!
Congratulations: you are done. This site now looks almost nothing like the default set up of the twentytwentyone theme.
Final Task: Duplicator
Using the Duplicator plugin (it’s already in your site), make an archive of your site.
To test the success of this site clone, install it in a new folder in your development environment: you will need to put copies of the installer and the zip archive into a new folder in htdocs (or equivalent), make a new database and go through the installation process again.
Once you’ve confirmed that the process works, put copies of your duplicator installer and archive in a folder named lastname-firstname-sharkproductions,
Do not rename the installer.php file or, especially, the zip file with the long name. Renaming that zip will break the link between it and the installer.
Zip the folder that has your name on it (and which has inside it the installer and zip with a long name).
In other words, your handin file will be called yourname-sharkproductions.zip. Inside it will be a file called installer.php and a zip file with a long name.
Work in folders that are not named correctly will receive a reduced mark. I don’t have time to search for files.
