Originally Created for WMDD 4840 2017 Midterm
Set Up a Testing Site
Download the latest version of WordPress.
Unzip it, and rename the resulting wordpress folder to your first name and last intial (for example: kevinm ). Put that folder where it needs to go to work in MAMP.
Set up your site. The site name will be European Guitarist. The site tagline can remain Just Another WordPress Site.
Import Some Content
Download this xml export of WordPress content. Import it into your site.
( If you’re at Langara, remember the workaround we need to use to install themes or plugins in the labs ).
Assign all posts to you rather than importing the user in the xml file (which is me).
As part of the import, be sure to include the images (by clicking download attachments). The download of the images might take a minute or two.
( If you ever want to do this in reverse, go Tools < Export. That will export your database as an XML file. The image import will only work, though, if the exporting site is live on the internet at the time of the import. )
Make Some New Content
Make two pages with the following names:
- Berlin—portrait
- Berlin—landscape
You can leave them blank for now.
Configure the Site
In your WordPress installation, install the TONAL theme.
Use the theme customizer to make the main Navigational area look like the screenshot below. This area shows up when the user clicks the hamburger menu.
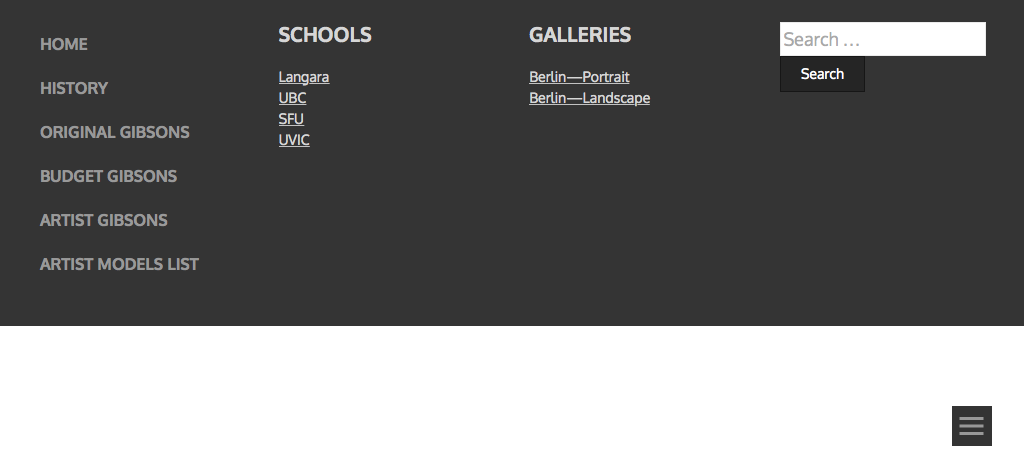
Hint: there are three menus visible, even though the theme has support for only one menu. Figure out how to add the other two. In the xml file you imported, there is content for the main menu: categories or pages. The other two you will need to make.
Download Some More Images
Please download these photos for use in the next section.
Install a Gallery Plugin
Install the NEXTGen Gallery plugin (official name: NextGEN Gallery – WordPress Gallery Plugin). When installing NGG, skip the offer to link it up to some other service.
Make two NGG galleries. One will be called Berlin—portrait and one will be called Berlin—landscape. Yes, these names match the names of the pages you created earlier.
Use the images you just downloaded in the section above. As you can guess from the names, the portrait gallery will have the “tall” images. The other will have the landscape (“wide”) images.
Put each gallery in its respective page that you created earlier. Make sure that the links in the main navigation area work.
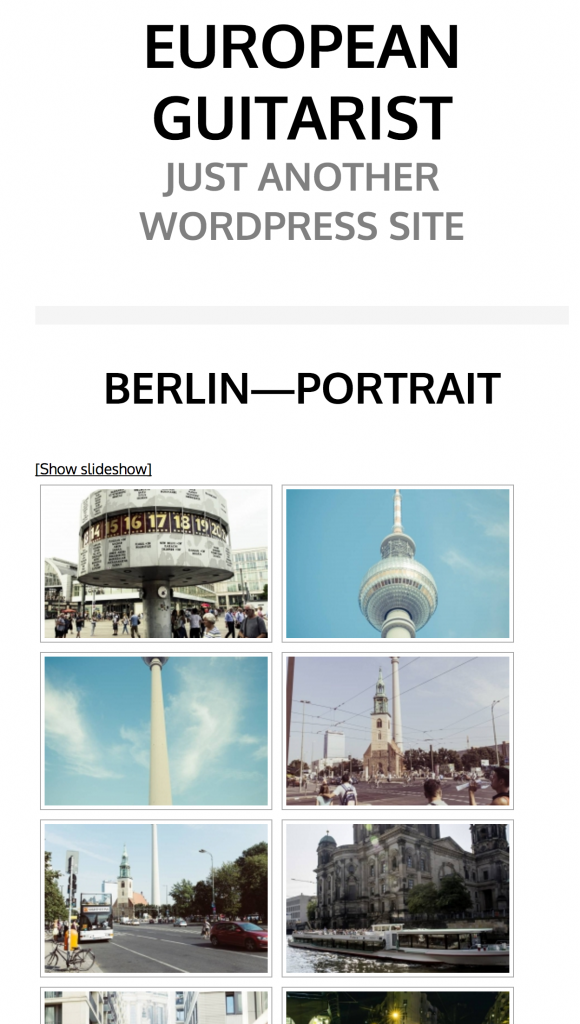
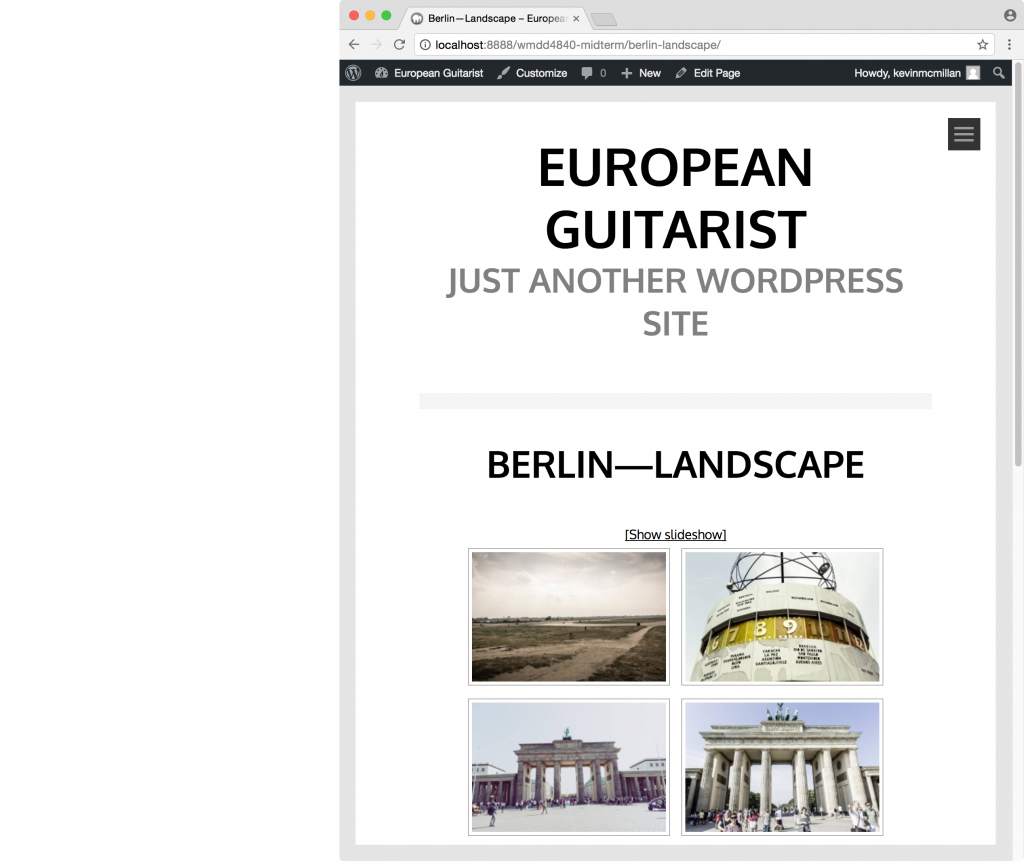
Each gallery page should look like this when it loads.
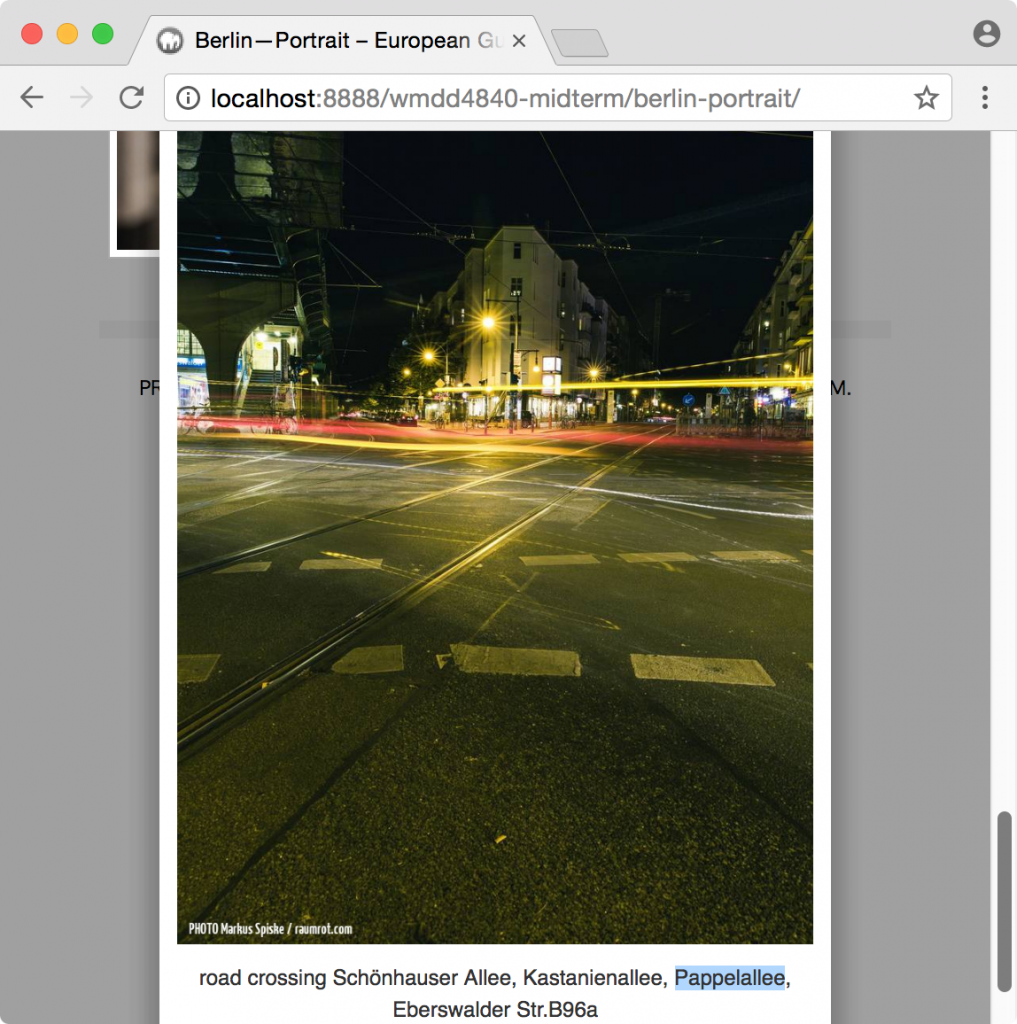
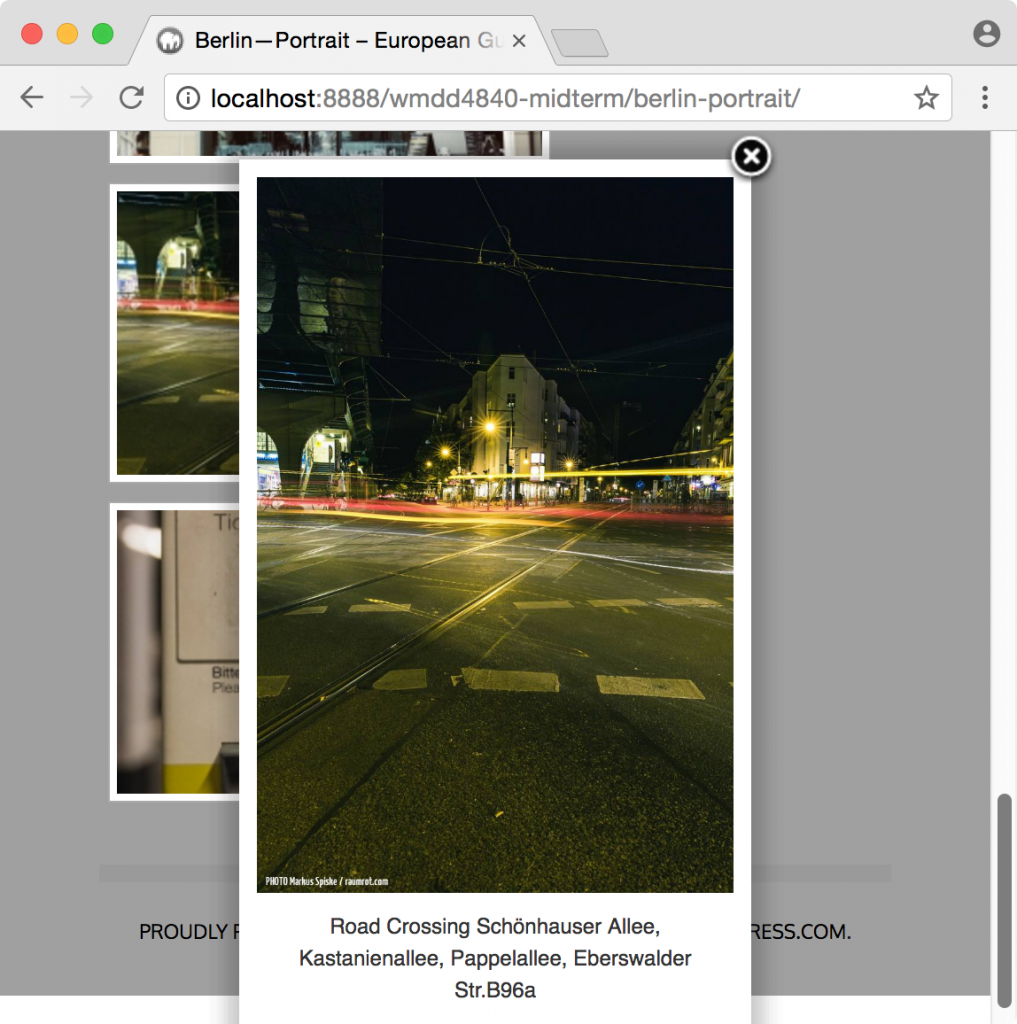
When the user clicks on an image, they will get taken to a slideshow style interface like this:
![]()
Bonus Marks
For 50% bonus marks, complete the following tasks.
Category Cleanup
Figure out how to delete the uncategorized category.
Capitalization
If you compare the following two screenshots, you will see that in the first one, not all the words in the descriptions on the images are capitalized. In the second screenshot, that is fixed. Make this happen without actually editing the descriptions: use CSS. ( And please ignore the fact that there’s a word selected in the first screenshot. )
Watermarks
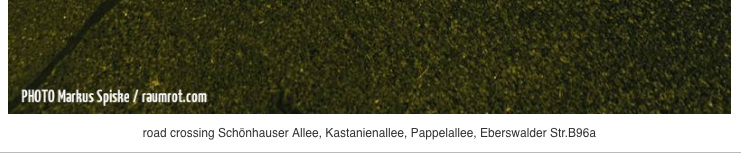
Figure out how to have NextGen Gallery add PHOTO Markus Spiske / raumrot.com as a watermark on each image, in the bottom left corner. These will be added to the actual image, not overlaid via CSS.
Overlay Color Change
When a user clicks an image, they are taken to a slideshow-style interface, with a light grey, partially see-through, screen. Change the color of that screen to a dark blue, as in the screenshot below:

Center the Galleries
If you look at the first screenshot of the gallery (not the single image view), you will notice that gallery is not centered in the page. Figure out how to fix that.
WMDD HAND IN Instructions
If you are a WMDD4840 student, install the Duplicator plugin and then make a Duplicator package. The package will have an installer.php file and a zip archive with a long name.
Put both in a folder and then hand them into your handin folder on studentshare.
Then go get a coffee and relax.
PUBL HAND IN Instructions
If you are a PUBL student, install the Duplicator plugin and then make a Duplicator package. The package will have an installer.php file and a zip archive with a long name.
Now give the Duplicator package to someone else in the class. Install their project in your MAMP setup, in a folder with the name other-student.
Once you’re done, show me or one of our friendly Instructional Assistants both your site and the newly installed site of your classmate.