Some of these “review” tasks we might not have done in class yet, or they might not all have been covered by the videos I’ve assigned.
If that’s the case, think of those parts of the task as “review while figuring out” exercises.
First, download these images.
You will use these images in a couple tasks in this exercise.
1) Make a new WordPress installation whose URL is the following
localhost:8888/canada
(on Windows, you most likely will not see the 8888 port number).
In other words, unzip a copy of WordPress, rename the folder canada, then make a new database in phpMyAdmin and connect it to the project by going to the above URL in a web browser.
To do this, you might be tempted to edit the WordPress Address or Site Address field in Settings > General:
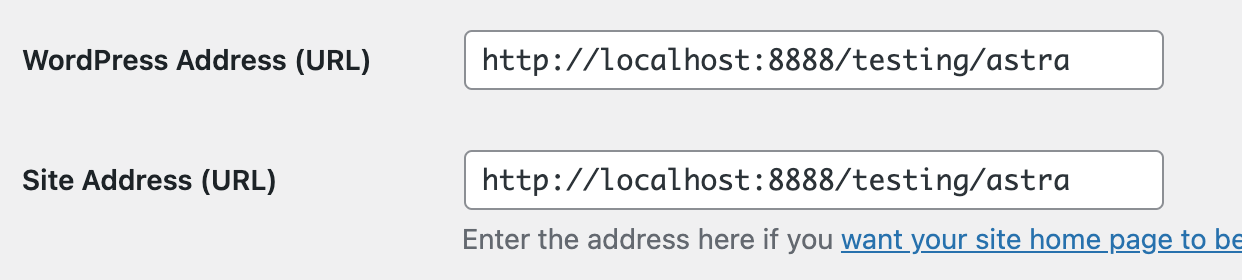
Resist that temptation: it will break your site.
2) In the Dashboard of your new site, go to Appearance > Themes.
If Twenty Twenty is not installed, click Add New Theme at the top of the page, then search for it, install it, and activate it.
In the first few exercises in our course, we’re using the traditional or “classic” themes. Twenty Twenty is one of these.
3) Make five posts. Titles: british columbia, alberta, ontario, quebec, nova scotia. Delete the Hello World post.
4) With each post, copy at least five paragraphs of related content from Wikipedia.com articles on each province.
( Or, if you prefer, generate content on these five provinces using chatGPT or another chatbot. )
If we paste wikipedia content, it will come with much of the wikipedia formatting intact. We don’t want that here.
Instead, right-click and choose Paste and Match Style (Mac) or Match Destination Formatting (Windows): the content will be pasted without Wikipedia’s default formatting.
Once you’ve pasted the stripped content in, format it attractively and with attention to semantics, using appropriate heading levels.
Add two or more headings to the content of the page. If you test the page and then Inspect it, you see that post titles are output as H1 elements in this theme. For that reason, use at least one H2 element for the deeper headings inside the post.
5) Give each post a Featured Image, from those you downloaded above. With some themes, the feature image will sit above or below the title when the post is viewed on the front page, in an archive, or in the full view of the post. If you can’t find the area in the Dashboard in which to add the feature image, remember that it is attached to the post rather than to a particular block.
6) Make three categories: Western Canada, Central Canada, Atlantic Canada. Place the posts into the appropriate categories. Categories can be created and/or assigned in the Post editing area, or they can be made by choosing Posts > Categories from the sidebar in the Dashboard. Make sure that none of your posts remain in the default uncategorized category.
7) Make a PAGE (not a post) entitled population with a table that in separate cells in each row lists each of the provinces we’ve made posts about, its capital city, and the approximate population (look it up or feel free to guess). Make sure that your table has a header row with Province, Capital, and Population as the heading of each column.
8) Make another page titled Canada Gallery. It it, make a gallery. This is not just a collection of images: it is a specific WordPress Block type. Use the images you downloaded for this exercise.
Make every picture in the gallery have a small caption underneath it (just name a Canadian city under each). The pictures don’t have to match the city name (especially since all the pictures are of Vancouver….)
Finally, make the entire gallery take the full width of the page.
9) Figure out how to put links to the home page, the three categories, and the two pages in the main menu at the top of the site. Make sure that the order of the menu items is home, western canada, central canada, atlantic canada, gallery, population.
Incidentally, if category links don’t work, it’s a WordPress / MAMP bug. To fix that issue, just go to Settings > Permalinks and press Save Changes (you don’t even need to make any changes, just do the save).
In the menu, make the link text for the Canada Gallery page just say Gallery. Do not rename the page to do this.
10) In a new menu, add links to four social networking sites. For the purposes of this exercise, you can just use the front of the sites (ie https://facebook.com) rather than your own personal social sites. Make sure that these links show up as icons. Hint: menu location.
Note: this is a menu, not a Social Links block.
11) Set up a custom permalinks structure so that site’s URLs look like this: localhost:8888/canada/western-canada/british-columbia.
(Windows users might not see the 8888 port number).
You do this in Settings > Permalinks, selecting Custom and then clicking on the buttons that will give you the desired URL structure.
12) Edit all your posts so that on the front page, category archive pages, or search pages, only the first paragraph of each post shows up (with an automatic continue reading button).
Those three kinds of pages (front, archive, search) are collections (also known as archives) of posts, so having just the first paragraph display makes it easier for the user to scan the content and then choose which full post they wish to read.
Users get to the front page by clicking on the site name at the top left of the site. They get to category archives by clicking a category: in this theme, the categories appear above the post title (and in the menu, you made earlier). And they get to the full view of a post by clicking the post title itself, or the featured image (depending on the theme).
To create this effect, you need to use a More block in the appropriate place in each post.
13) Change the date of publication for the British Columbia page to February 14, 2016. Make sure, however, that it always appears at the top of home page listing of posts. Do not change the dates of publication for the other posts.
This might take a bit of google.
14) Make the background color of the main area of the site light green (#ddddcc). Do this using the Customizer, which is accessible in a couple places in the Dashboard.
15) Finally, figure out how to make the social menu icons look like this ( square, black background, light blue icon color):
Do this in the WP Dashboard also, in the Additional CSS area of the Customizer.
To make these CSS changes, you will need to use your browser’s Developer Tools to inspect the page.
Don’t edit theme files directly (ie don’t edit files in Appearance > Theme Editor).
Useful Tip: when doing this CSS, it’s useful to have two windows open: one to work in the Customizer (where you’re editing the CSS), and the other to view the site. Since the Customizer adds lots of CSS and HTML to a page, it’s easier to inspect code in a window in which the Customizer is not active.
What To Hand In
When you are done, please make full-page screenshots of
- the home page,
- the full view of the quebec post,
- the population table page, and
- the gallery page.
Loom video (under 4 minutes) demonstrating how to take full-size screenshots in Chrome and Firefox.
If the screenshots show missing images, scroll down to the bottom of the page to force the the images to load, then take the screenshot again.
If it still doesn’t work, try the GoFullPage Chrome extension.
The screenshots must show the entire webpage, not just the part visible in the browser.
Name each screenshot home, quebec, population, or gallery.
Once you have these screenshots, please do the following:
- put them in a folder named
yourlastname-yourfirstname-canada - zip that folder
- hand in the zip file to our course learning management system.
If you are a Langara student, that will be in Brightspace.
If you are an Emily Carr student, that will be in Moodle.
Important: files and folders not named as requested will be penalized 25% .