If you’re going to do any WordPress work— indeed, even if you want to just test plugins, themes, etc before deploying them to a production site—it will serve you well to learn how to set up a testing environment on your own computer. That way, you can experiment or test things without worrying about breaking a live site.
Fortunately, a package called MAMP greatly simplifies this task.
MAMP originally stood for Mac Apache MySQL PHP. Apache is the most common web server, MySQL is a very popular database, and PHP is the most common server-side language used in dynamic (database-generated) sites.
However, now that there is a Windows version of MAMP, the official line is the the initial M now means my. ( Whatever… )
There are a number of other AMP packages, for Mac, Windows, or Linux—including WAMPServer, XAMPP, Bitnami, and more—but MAMP is very versatile and easy to use, so that’s what we’ll use in the class.
The instructions below will explain how to install MAMP & WordPress on Mac. Windows instructions will be similar.
The first few times you do this, you might find it intimidating or confusing, but soon you’ll be able to set up a new installation of WordPress in a minute or two.
With a few clicks, we can install a web server, a database server, and the php language in a self-contained package on our computers.
With a couple more clicks, we can create a database and configure WordPress to run in our test environment.
Get MAMP
In a Computer Lab
Note: if you’re taking a lab class at Emily Carr, MAMP is already in the lab you are using. Please skip to the next section (on the htdocs Folder).
If you’re on a lab Mac at Langara, you will need to install MAMP using the Self Service application. You cannot install it the way you would on your own computer. Here’s how you do it in the lab:
- press command-spacebar and type self service to search for the program. Press RETURN.
- Once Self Service starts up, select WMDD from the side menu.
- Click on Install (or reinstall) MAMP.
- Now, please skip to the next section (The htdocs Folder).
Please install MAMP on only one lab computer. Do not use MAMP on any other lab computer: it will cause the application to not work if multiple people use it.
On Your Own Computer
To install MAMP on your own computer, download it from https://mamp.info/en/index.html. You don’t need to buy MAMP Pro: the regular version is fine. Once you’ve downloaded MAMP, install it by double-clicking the package.
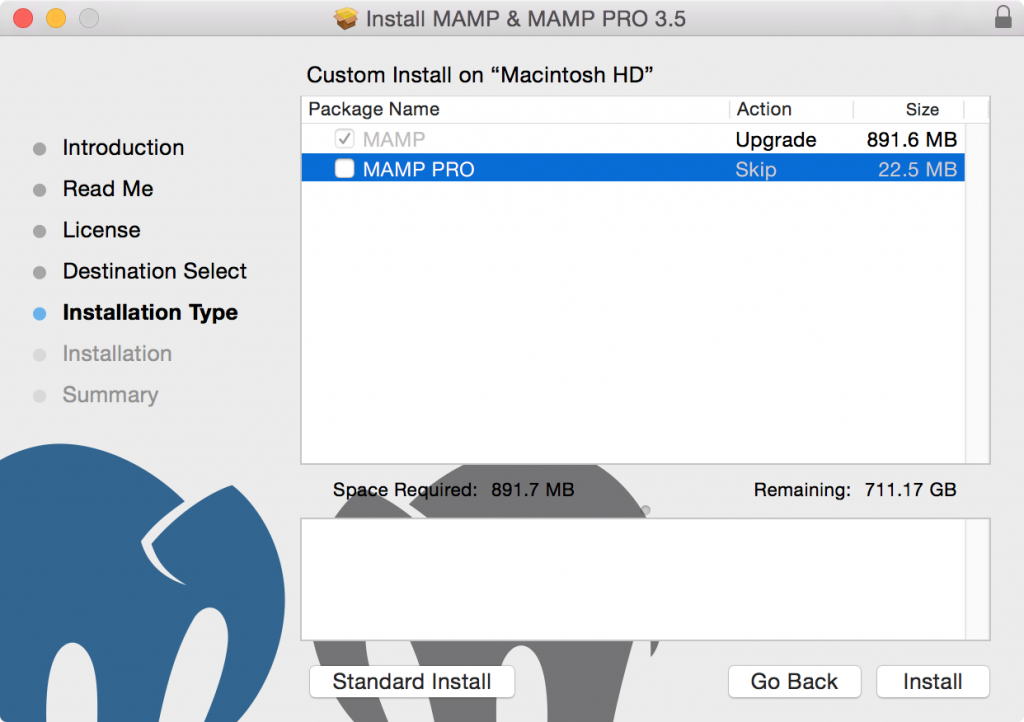
Two screens in the installation are worth commenting on.
In the Destination Select screen, the Continue button is not available until you click on the Install for all users… option.

In the Installation Type panel, select Customize and deselect MAMP Pro. You don’t need the Pro version at this point.
The htdocs Folder
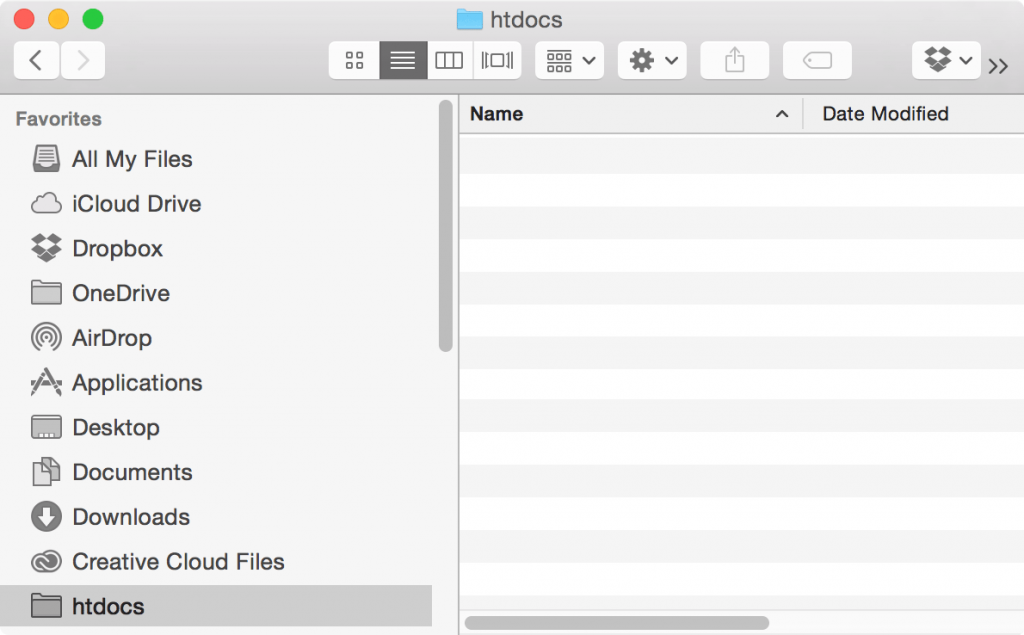
Once you’ve installed MAMP, open the MAMP folder inside the Applications folder. There you will see a folder called htdocs.
That is the folder in which you will put your WordPress projects. Because you will be returning to this folder a lot, drag it into a Finder window sidebar (the Favorites area) so you can get to it quickly. On Windows, make a shortcut you can get to it easily.
Get WordPress & Install it on your MAMP Server
Now go to the WordPress.org website and download a copy of WordPress.
I will typically drag the downloaded zip file into htdocs. That way, I can later use it to make additional WordPress installations just by unzipping the zip file.
In htdocs, unpack the downloaded zip archive by double-clicking (Mac) or right-clicking (Windows). This will create a folder called wordpress. Rename it mynewsite for this exercise.
This way, we can have multiple installations of WordPress to test different sites, designs, etc. Just be sure to use web-safe naming: no spaces, or funny characters, etc.
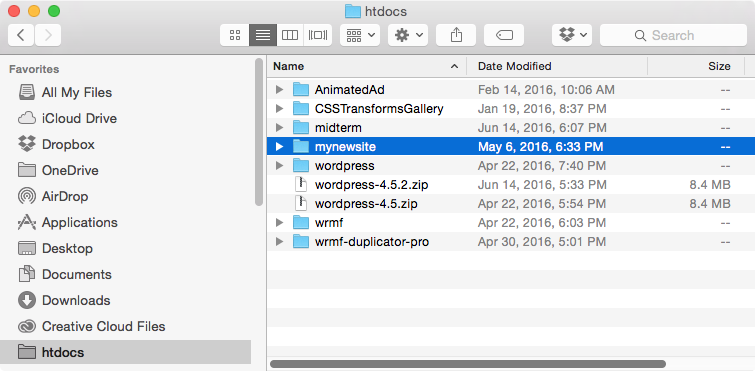
In the screenshot below, we can see that I have multiple projects going (including mynewsite), each sitting within htdocs. For this exercise, the mynewsite folder is enough.
Create A Database
Start MAMP by double-clicking its icon. This will bring up the main Application screen. If you see two green lights (for Apache server and for the MySQL server), you’re ready to go. If not, click on the Start Servers button.
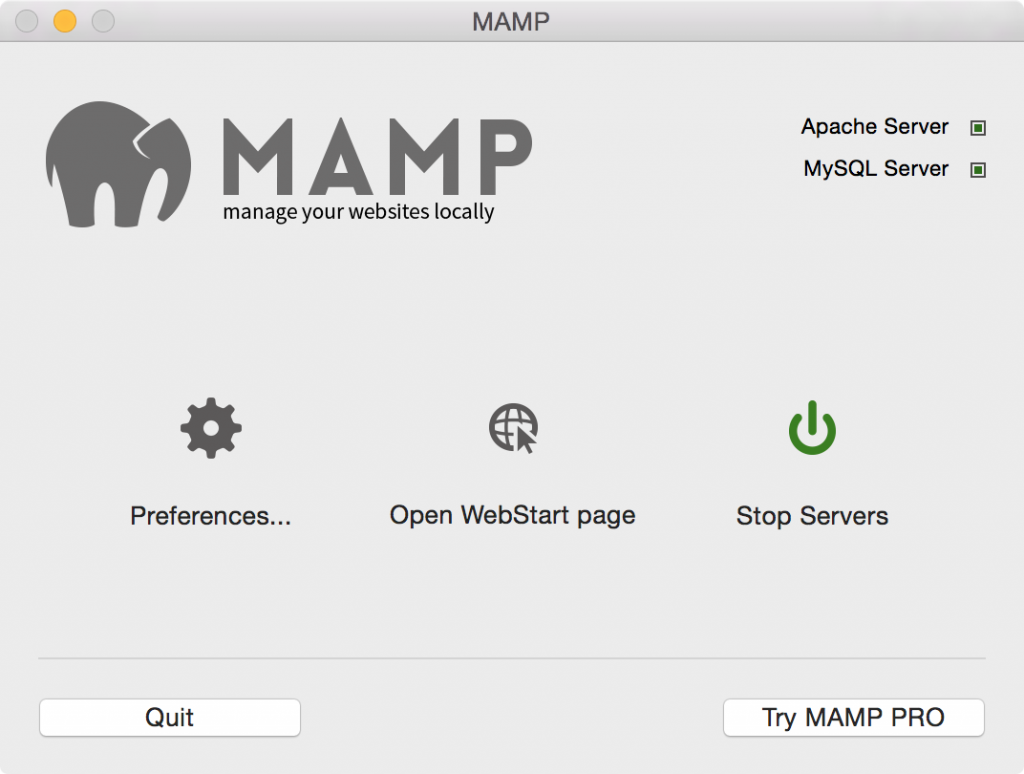
Once you’ve got the servers running, click the Open Web Start page button on the MAMP screen.
When that page opens, go to the menu bar at the top of the page, click on Tools and select the phpMyAdmin link.
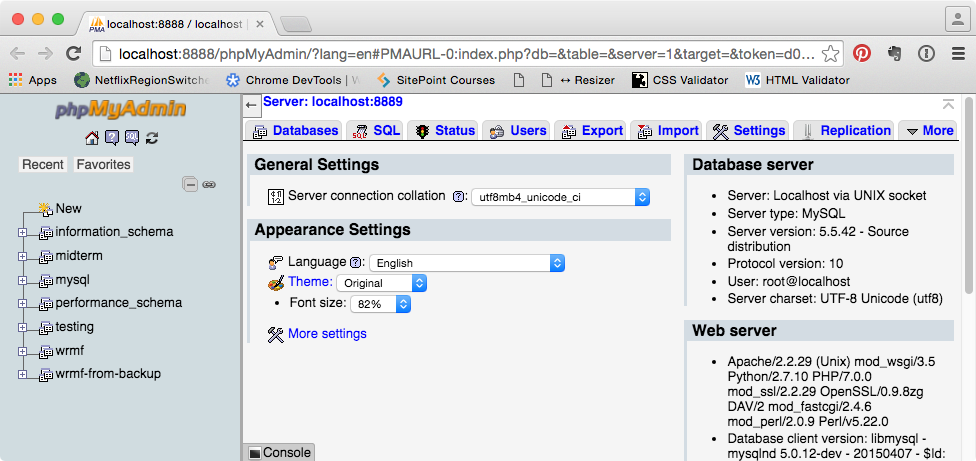
The opening screen of phpMyAdmin will probably look like this (apart from mine having some already-created databases listed on the left):
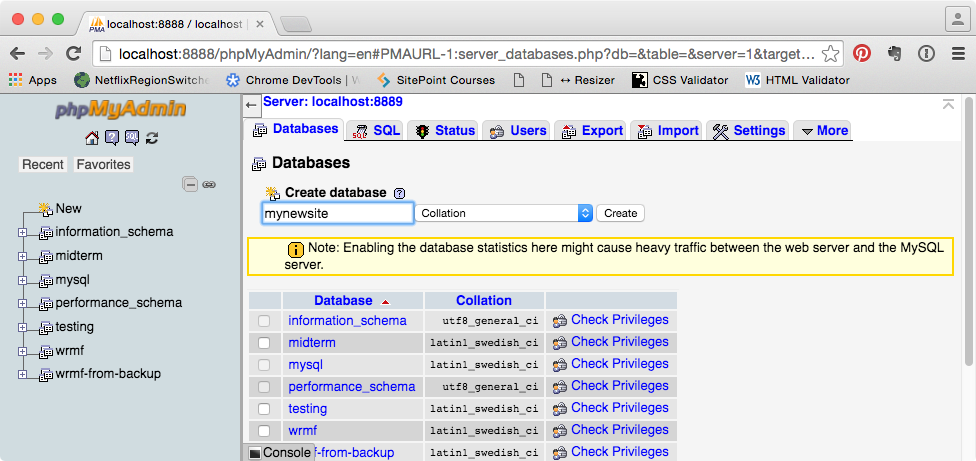
Click on the Databases tab. In the Create database field, type in the name of your database (no spaces or funny characters).
I will typically name mine the same as what I named the WordPress folder (in this case, mynewsite) but you don’t have to if you have a better memory than I do. Follow websafe naming conventions.
A security aside: if you were creating a database for a live site, you would want to use an obscure a name as possible, in order to make it harder for others to guess or otherwise generate the database name. But since this is just your development environment, you won’t have it exposed to the internet.
To summarize: all you need to do in phpMyAdmin is type a database name into the Create New Database field and then click Create Database.
Once you’ve done that, phpMyAdmin will list the database on the left.
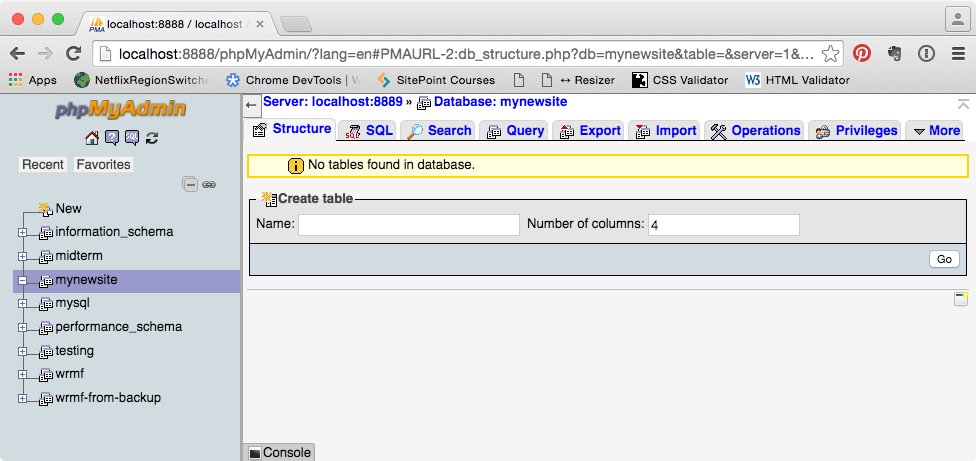
You can now close phpMyAdmin.
Connect WordPress up to the Database
So we’ve created a database. Let’s tell WordPress about it.
To do that, go to the MAMP Startup Page (it opens when the servers start up). Then click on My Website from the top menu. On a Mac, this will take you to localhost:8888 (on some Windows setups, I believe you might not see the :8888)
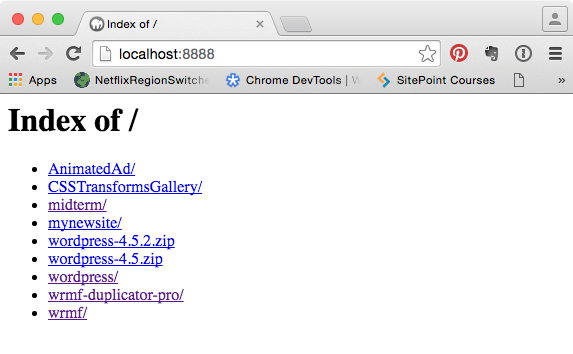
This will list what’s inside your htdocs folder. Click on the mynewsite link (or whatever you called your site).
Now you’ll see that the first part of your site’s URL is localhost:8888 + whatever you’ve named your WordPress folder.
WordPress will now ask you to set up your local installation, starting with the language you’ll use. I’m just going to use the default English (United States), but feel free to choose English (Canada) or any other language.
After you submit your language choice, WordPress will then tell you that it needs to know about your database:
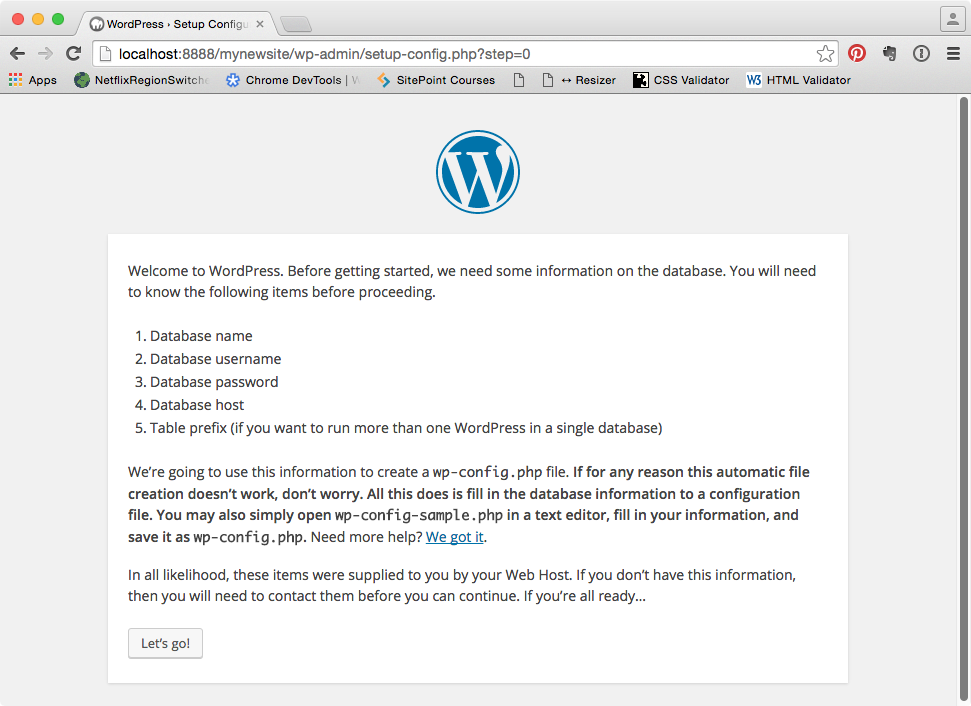
Click the big Let’s Go button. The next step will configure WordPress with that information. If you remember the name of the database you created, you’re in good shape. Use the values in this screenshot.
If you named your database something different, use the name you used when you created it. For the other values, use those below:
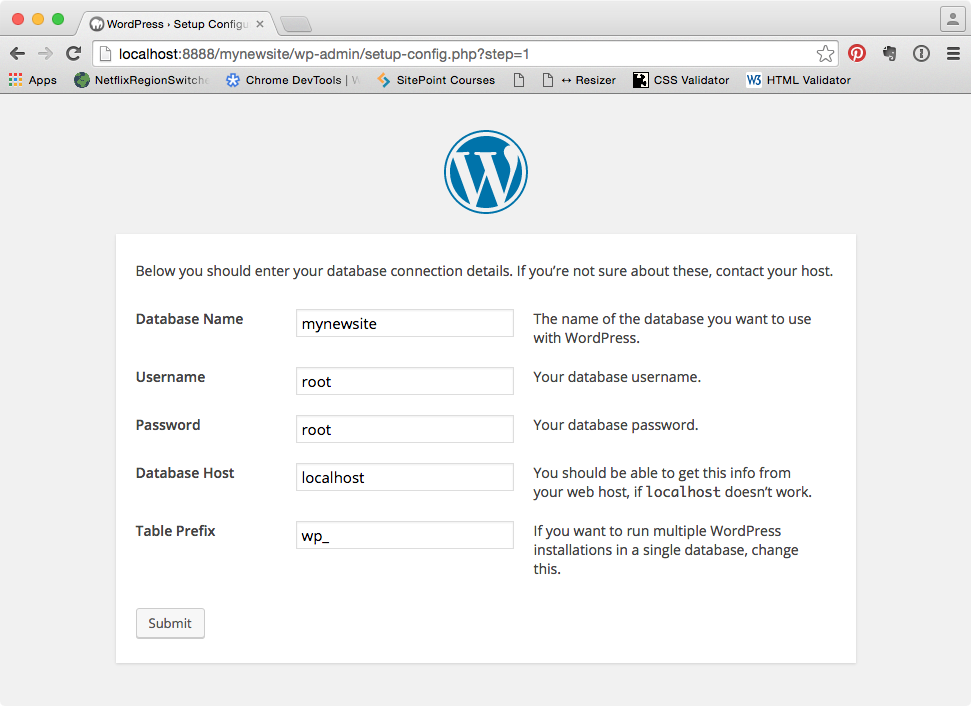
The Database Username and Password are always root (in your testing environment only: don’t do this when setting up a live site).
(If you end up using a different AMP environment (like WAMPServer, particularly on Windows, there might be a different database user password).
For Host and Database Prefix, use the default values.
Click Submit
If everything goes to plan, you should now get the famous All Right Sparky! message.
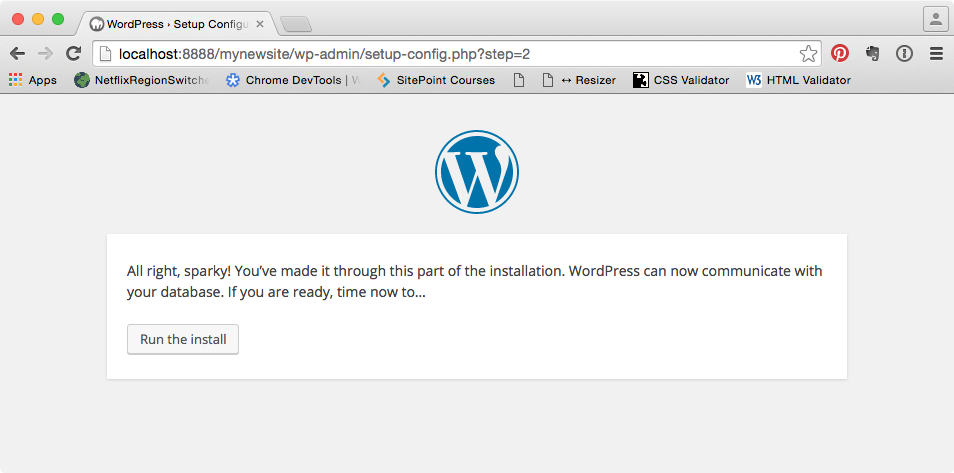
Click Run The Install, and you will then be asked to fill out the typical WordPress installation details. Site Name, Admin User, etc.
Don’t use root for the admin user here. For this testing environment, consider using, say, your first name for the user name and something easy and obvious for the password. If you forget the password, it’s a tiny bit tricky to reset it (unlike on a live WordPress site, where you can get a reset link sent to you).
In my classes, I get the students to use their first and last name as the username and password. Hopefully you will not forget those.
Enter that info. Click Install WordPress.
Once the installation is complete, you will be presented with the WordPress login screen. Login with the WordPress user you made just now (not the database user root).
An Additional Note for Langara Students
Owing to network restrictions at Langara, if you wish to install themes or plugins in your test environment in a Langara lab computer, you cannot do it directly from the WordPress dashboard. Instead, you have to download the theme or plugin from the WordPress.org website and manually install it in the test environment.
The paths for this are as follows:
/Applications/MAMP/htdocs/YOUR_WP/wp-content/themes
and
/Applications/MAMP/htdocs/YOUR_WP/wp-content/plugins
Where YOUR_WP = the WordPress installation you set up according to the instructions above.
You will not have these restrictions on your own computer, just the Langara lab ones.
A workaround for the Langara Network Restrictions Lab Issue.