You can use practically any text editor to build WordPress themes, and you can run SASS directly from the command line, but Integrated Development Environments (IDEs) like Netbeans come with a lot of advanced functionality, such as sophisticated code-hinting, that will quickly become evident as you start to use them.
Installing The Software
These installation instructions here are for your own computer. SASS and Netbeans are already installed in the lab(s) we’re using.
Installing SASS
If you’re using a Mac, installing SASS is easy.
Just open up Terminal from the /Applications/Utilities folder. Then type in the following:
sudo gem install sass
You will likely be asked for your admin password. Enter it and press return. Once the command prompt appears, type the following to see if the install was successful:
sass -v
If you’re on Windows, follow the instructions found on this page.
Installing Netbeans: Please read carefully.
The full version of Netbeans requires the Java Development Kit.
However, if you download the HTML/JS version, you don’t have to install the JDK.
PHP is also now built-in with the HTML/CSS version of Netbeans.
In the screenshot below, from the download page, the version you want is in the third column:
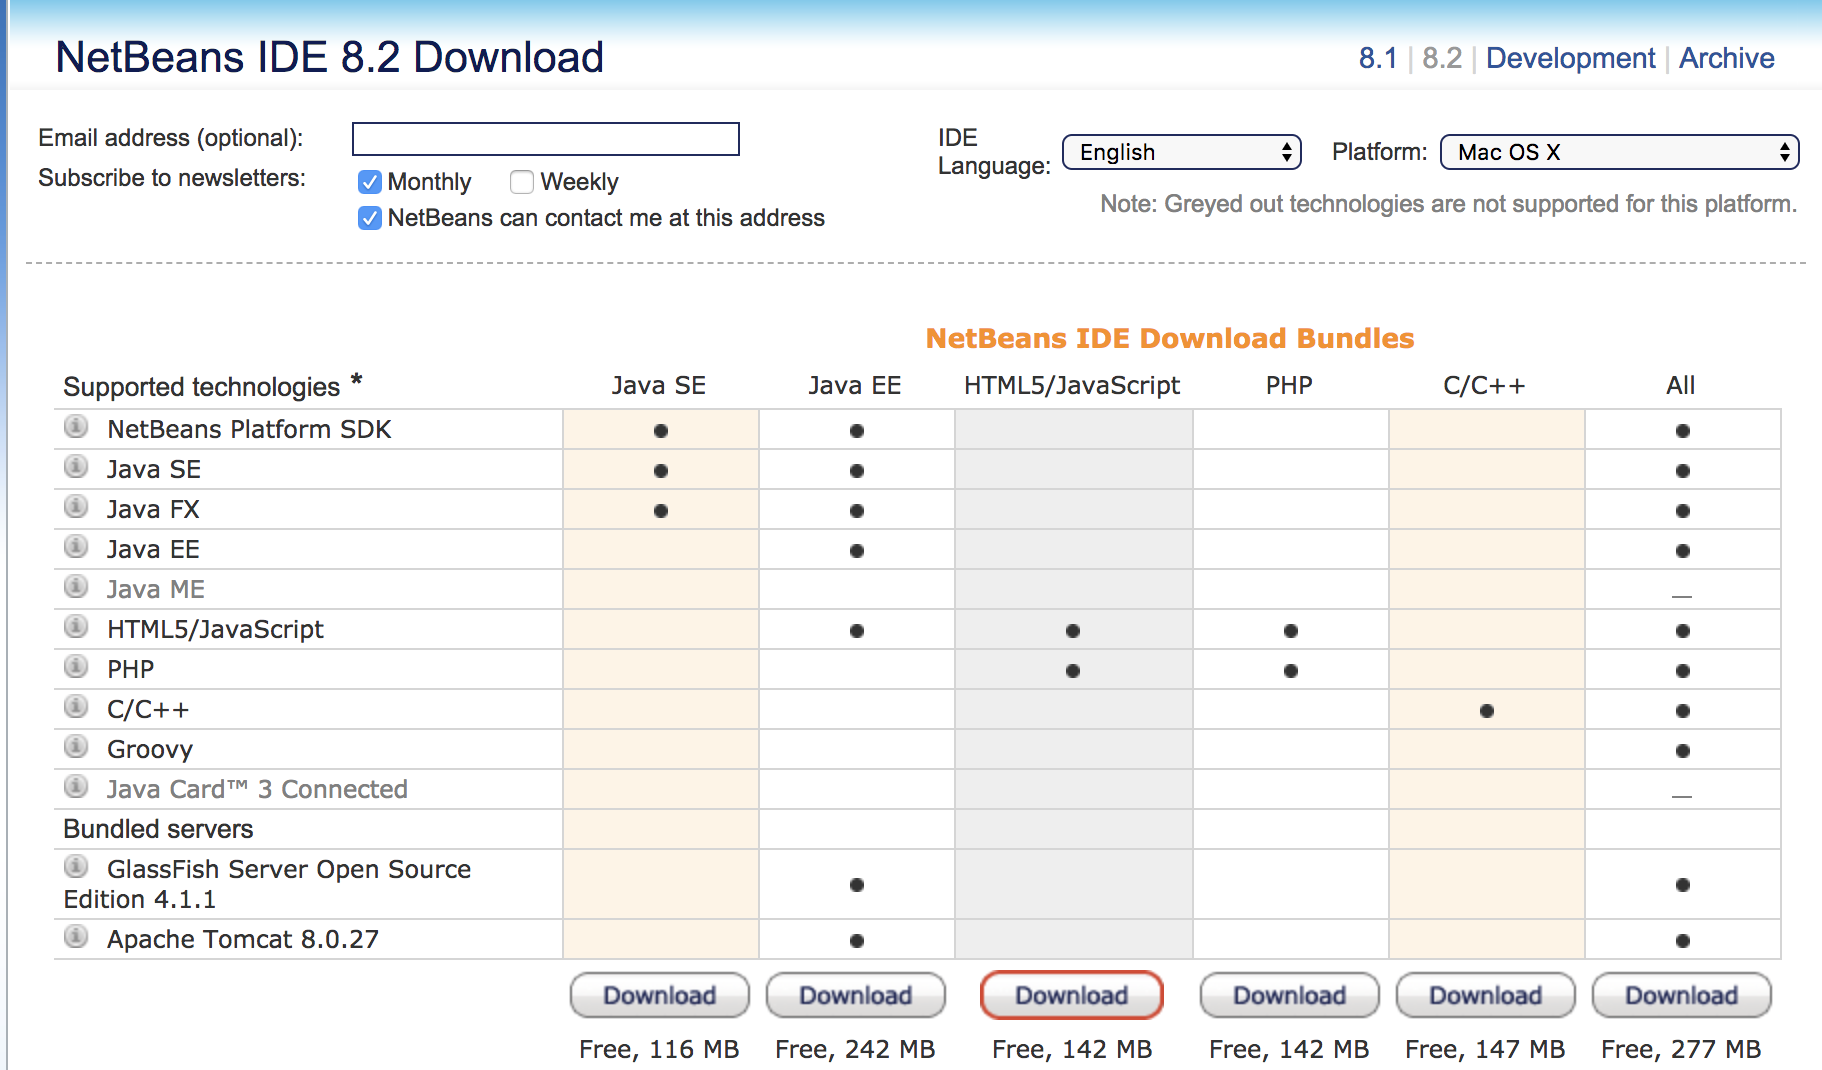
If you get that version, you will avoid some annoying version conflicts, and can ignore what follows in the rest of this document.
NOTE: what follows is kept here for legacy purposes only. You can avoid the remaining steps if you follow the steps above correctly.
Again: please ignore the rest of this article.
Updated Feb 27, 2018: Since this article was written, JDK9 has come out. JDK9 is NOT COMPATIBLE with Netbeans 8.2.
If you haven’t done the installation yet, you can download a combined Netbeans & JDK8 package from this location.
If you have already done the installation, you have two options:
- you can uninstall and run the combined installer (link above).
- or you can download version 8 of the JDK and point Netbeans to it instead of version 9 (instructions below):
Pointing Netbeans to the Earlier Version
First, download and then install version 8 of the JDK
https://www.oracle.com/technetwork/pt/java/javase/downloads/jdk8-downloads-2133151.html
Then point Netbeans to version 8 by editing one line in the netbeans.conf file.
That file is found here:
Mac OS: /Applications/NetBeans/NetBeans8.2.app/Contents/Resources/NetBeans/etc
Windows: C:\Program Files\NetBeans 8.2\etc\
To get to that location on Mac OS, either use terminal (if you’re comfortable editing files in terminal) or right-click when you get to the NetBeans8.2app and choose “View Package Contents” and then continue on the path.
More details (https://stackoverflow.com/questions/46476470/cant-create-project-on-netbeans-8-2)
Windows: https://www.youtube.com/watch?v=wLdi7aRsKsQ