Two common ways to put video into a webpage are using a hosted service like YouTube or using the HTML5 video element.
There are advantages to each method, which we’ll discuss in each section.
Using YouTube or Vimeo
Using YouTube, Vimeo or other services is easy, as they will supply the code to embed in your own document. On YouTube, find the video you want to use, then click on Share underneath the video window and then choose Embed.

Copy the code that’s selected above. If you want additional options, click on the SHOW MORE link.
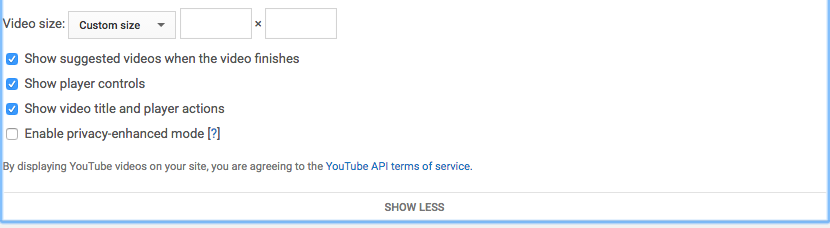
This will allow you to change the size, or turn off the suggested videos feature at the end of the video, etc.
If you paste the iframe code into your html document, you’ve added the video to your page.
Making YouTube or Vimeo Content Responsive
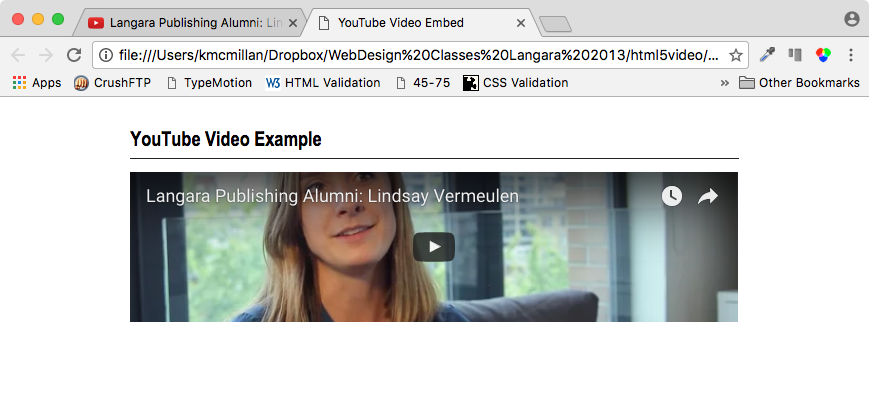
The only problem with this process, however, is that by default the YouTube or Vimeo embed isn’t responsive, as the screenshot below demonstrates:

One might think that the solution would be similar to that used for responsive images: setting the iframe’s max-width to 100%.
This will not work, however. The trouble is that without a specified height value (and “auto” doesn’t work), a browser will make the iframe 150px tall. After adding that code, we see in the screenshot below that the width changes but the height does not keep the aspect ratio.
The solution is described in a number of places, including CSS Tricks.
In a nutshell, you absolutely position the iframe inside another element like a DIV, then use padding to increase the height of the container element (DIV, in this case) as its width increases.
In the code below, that DIV is given a class of videoWrapper:
.videoWrapper {
	position: relative;
	padding-bottom: 56.25%; /* 16:9 */
	padding-top: 25px;  /* for video controller */
	height: 0;
}
.videoWrapper iframe {
	position: absolute;
	top: 0;
	left: 0;
	width: 100%;
	height: 100%;
}
You might wonder where the number 56.25% came from.
That’s derived from the aspect ratio of the video. By making the container the same aspect ratio as the video, and then making the the iframe the same width and height as the container, the video is made responsive.
If your video is in 16:9 format, this number will work. The video in the screenshots was 560 by 315. If you divide the height by the width you get the percentage you need.
If your video has another aspect ratio, just do the math (height/width) and change the padding-bottom percentage.
Quite a clever solution.
Advantages of Hosted Video Services
- Speed: YouTube’s CDNs will typically be faster than your own hosting. If your site is going to do a lot of video, you will need a more robust server infrastructure than you might ordinarily need.
- Ease: Copy some code for the embed and the CSS to make it responsive and you’re pretty much done.
- Compatibility: YouTube will serve the content in a form the browser wants it in.
Disadvantages of Hosted Video Services
- If you put your video on YouTube, you have less control over how it’s used. Other people can embed it in their pages (although that can be turned off in your YouTube account settings).
- YouTube makes its money serving ads, so you might have them show up before your video plays.
- Interface: if you want to use a custom interface, it’s more work than with HTML5 native video.
The HTML5 Video Element
Putting video on your page, without going the hosted route described above, has gotten easier with the introduction of the HTML5 video tag.
In its simplest form, it behaves like the image tag, except that it isn’t self-closing.
<video src="my_video.mp4"></video>
This will display the movie in the page. However, the movie won’t have controls, it won’t play automatically, and won’t be triggered to play (without javascript).
This means that at least one attribute is pretty much mandatory (unless we want to create our own interface elements): controls.
<video src="my_video.mp4" controls></video>
You might not have seen attributes specified in the manner before, but a number of boolean attributes in HTML5 are specified with single words rather than the traditional attribute= “value” format.
In HTML4, we would write things like controller = “true” or autoplay = “true” and loop = “false”, but in HTML5, the presence of the attribute gives a true value while the absence gives a false value.
An Example Video
Go to pexels.com and download a sample video. In the examples below, I’m using a time lapse of traffic around the Arc de Triomphe in Paris.
Make an HTML page and add the following code to the page (using the video you downloaded, of course):
<h1>HTML5 Video Example</h1>

<video src="videos/arc-de-triomphe.mp4" controls></video>
Test the page. You’ll see that the video is displayed and if you scroll down, you’ll see that the controller is there too.
However, the video isn’t innately responsive. Fortunately, our responsive images solution will work when it’s applied to the video tag. Add the following CSS to your styles:
video {
  width: 100%;
  height: auto;
}
Test the page. Resize it. The video should shrink and expand proportionately.

Other Useful Attributes
Boolean Attributes
As noted above, with the boolean (true or false) attributes, we need only a single word.
- autoplay: start playing automatically
- muted: sound turned off
- loop: video will replay automatically
Non-Boolean Attributes
With non-boolean attributes, we need to specify values for attributes
- poster: a URL for an image to represent the video until it plays
- preload: none, metadata, auto
For a good discussion of these and other attributes you can use, consult the Mozilla Developer Network page on the video element.
So, What’s The Problem?
The above example used a single video file, an h264-codec mp4 file.
If you read online discussions of the video element from a few years ago, you will learn that initially there was a lot of confusion over which video format to use, as different browsers supported different formats.
This has simplified considerably in recent years. If you search caniuse.com for video, you will see that nearly every modern browser supports it. And happily, if you search for mp4 or the h264 video codec, you’ll see that most browsers will support it.
For the browsers that don’t support mp4, however, there are a couple approaches we can take:
Put A Download Link In The Code
If a person’s browser does not support the HTML5 video tag, we can leave a download link for them to get the video and watch it outside their browser
<video src="videos/arc-de-triomphe.mp4" control>

   Your browser does not support appear to support HTML5 video. However, you can download this video and watch it in your favorite video player:<br>
<a href="videos/arc-de-triomphe.mp4">Download video</a>

<video>
We can even go further, by encoding our video in other formats and then delivering them with multiple SOURCE ELEMENTS. This element, used with a SRC ATTRIBUTE (which might seem a bit confusing), allows us to specify multiple formats. This way, we can serve video to those browsers that don’t support mp4. The browser will play the first video it supports.
In the example files I’ve given you, there are videos encoded as webM (.webm) and ogg vorbis (.ogm) formats. I’ve used different videos for each format in order to demonstrate which is being loaded by which browser, but normally, we would use the same video encoded into multiple formats.
<video controls>
     <source="videos/arc-de-triomphe.mp4">
     <source="videos/stockholm-night.org">
     <source="city-night.webm">

    <Your browser does not appear to support HTML5 video. However, you can download this video and watch it in your favorite video player: <br>
    <a href="videos/arc-de-triomphe.mp4">Download video</a>

<video>
This might be overkill at this point, though: according to CanIUse.com, mp4 has about 94% support. It lists Opera Mini as the only major current browser being supported, but I know from testing that at least in iOS, even that browser will play mp4.
Things may change in future, however, as disputes over patents on the mp4 compression process play out.
If you need to convert between formats, one quick way to do so is to use the encoder at firefogg.org. The app must be used in Firefox to work, though.
To be posted shortly—part two: adding a custom controller to your video.